
LMM Duramax Common Problems (2007.5-2010): The Complete Owner and Buyer Guide
Sep 28th 2026
Table of Contents
- LMM Duramax Overview and Specifications
- DPF Clogging and Regeneration Problems
- EGR Valve, EGR Cooler, and Intake Soot Buildup
- LMM Fuel Injector Problems
- CP3 Injection Pump Wear and Low Rail Pressure
- VGT Turbocharger Vane Sticking and Up-Pipe Leaks
- Coolant Loss: Water Pump, Turbo Coolant Lines, and Hidden Leaks
- Transmission Cooler Line Leaks
- Glow Plug and Glow Plug Controller Failures
- Piston Cracking on Modified LMM Engines
- LMM Duramax Trouble Code Quick Reference
- The LMM Maintenance Plan That Prevents Most Failures
- Buying a Used LMM Duramax: Inspection Checklist
- Repairing an LMM the Right Way: Parts and Support From Bostech
- Frequently Asked Questions
- Disclaimer
The LMM Duramax holds an unusual place in GM's diesel history. Mechanically, it is very close to the LBZ that came before it, an engine many owners still consider the best Duramax ever built. But the LMM arrived in mid-2007 with something no earlier Duramax had: a diesel particulate filter. That single addition, along with a recalibrated EGR system and a new regeneration strategy, changed how the engine ages, how it should be driven, and which parts wear out first.
The result is an engine with a strong bottom end, a dependable Bosch CP3 injection pump, and a well-earned reputation for longevity, paired with an emissions system that punishes short trips, skipped maintenance, and ignored warning lights. Most LMM trucks that end up on a tow hook have a healthy engine block. The failures tend to come from the DPF, the EGR system, the injectors, the turbocharger vanes, and a handful of leaky lines that GM never quite got right.
This guide covers every common LMM Duramax problem in detail: what fails, why it fails, the symptoms and trouble codes that point to each failure, and the repair approach that fixes the root cause instead of the symptom. It also includes a maintenance plan, a used-truck inspection checklist, and guidance on sourcing parts. If you need help matching a part to your truck while you read, Bostech Auto's customer service team is available at 1-800-868-0057 or customerservice@bostechauto.com.
1. LMM Duramax Overview and Specifications
GM introduced the LMM partway through the 2007 model year alongside the redesigned GMT900 Silverado HD and Sierra HD. Trucks built before the changeover, sold as the 2007 "Classic" body style, kept the LBZ. Trucks in the new body received the LMM, which remained the only Duramax offered through the end of the 2010 model year. The LML replaced it for 2011.
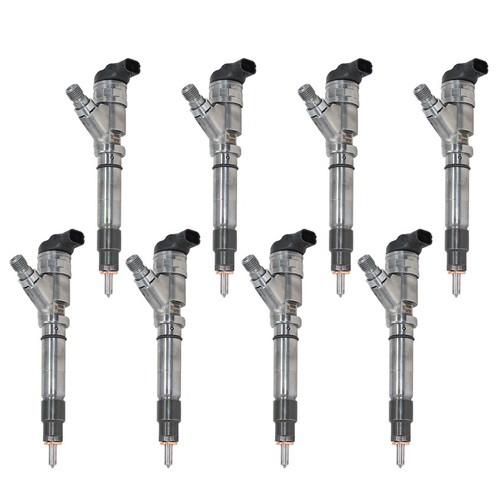
The LMM retained the core architecture that made earlier Duramax engines durable: a cast gray iron block, aluminum heads, four valves per cylinder, a Garrett variable geometry turbocharger, and Bosch high-pressure common-rail injection fed by a CP3 pump. What changed was everything downstream of the exhaust ports and much of the engine calibration needed to support it.
Key LMM Specifications
- Model years: 2007.5 through 2010 Chevrolet Silverado HD and GMC Sierra HD, plus medium-duty Kodiak and TopKick trucks and Express and Savana vans in lower-output tunes.
- Displacement: 6.6 liters (403 cubic inches), 90-degree V8.
- Pickup rating: 365 horsepower and 660 lb-ft of torque.
- Fuel system: Bosch common rail with a CP3 injection pump and solenoid-actuated seven-hole injectors.
- Turbocharger: Garrett variable geometry (VGT) unit with an intercooler.
- Emissions equipment: Cooled EGR, diesel oxidation catalyst (DOC), and diesel particulate filter (DPF). No DEF or SCR system.
- Transmission: Allison 1000 six-speed automatic.
- VIN engine code: The eighth digit of the VIN is "6" on LMM trucks.
What Changed From the LBZ
Owners often describe the LMM as an LBZ with a DPF bolted on, and that description is close enough to be useful. The block, rotating assembly, CP3 pump, and injector design carry over with minor revisions. The differences that matter for reliability are the DPF and DOC, an exhaust system designed to support active regeneration, a revised EGR calibration that recirculates more exhaust gas, and engine software that injects extra fuel late in the combustion cycle to heat the DPF during regeneration.
Those changes explain nearly every LMM-specific problem in this guide. More EGR flow means more soot in the intake. Regeneration fuel means more fuel dilution in the oil. A filter in the exhaust means more backpressure and more heat when the filter loads up. If you already own an LBZ or have read our LBZ Duramax Common Problems guide, you will recognize the injector, water pump, and turbo issues. The DPF and regen-related problems are new territory.
Where the LMM Has an Advantage
For all the attention its emissions equipment receives, the LMM has real strengths that make it worth owning. It keeps the CP3 pump, which removes the single biggest risk on the LML that followed it. It has the Allison six-speed, which is well suited to towing and holds up well at stock power. It has no DEF system, so there is no fluid to buy, no DEF heater or pump to fail, and no NOx sensors to replace. And because it shares so much with the LBZ, parts availability is excellent.
- CP3 injection pump with a strong durability record.
- No DEF, SCR, or NOx sensor maintenance.
- Allison 1000 six-speed automatic with tow-friendly gearing.
- Broad parts support shared with the LBZ for injectors, turbo components, and cooling parts.
How Long Does an LMM Duramax Last?
A well-maintained LMM routinely passes 300,000 miles on its original block, crankshaft, and heads. The engine's internal design is not the limiting factor. Life expectancy depends almost entirely on how the emissions system has been treated, how often the oil and fuel filters were changed, and whether injector and EGR problems were caught early or allowed to spread damage to other components.
LMM Variants in Medium-Duty and Van Applications
Not every LMM lives in a pickup. GM also installed the engine in Chevrolet Kodiak and GMC TopKick medium-duty trucks and in Express and Savana vans, each with its own lower-output calibration. These versions share the same basic hardware, so the injector, EGR, cooling, and turbo issues in this guide apply to them as well. Vans and medium-duty trucks often see more idling and stop-and-go use than pickups, which makes them especially vulnerable to the DPF and soot problems described below.
- Kodiak and TopKick trucks used detuned LMM calibrations for vocational and fleet duty.
- Express and Savana vans used a lower-output version suited to the van chassis and cooling package.
- Fleet and delivery use with frequent idling increases soot loading and regeneration frequency.
- Parts compatibility can differ by application, so always confirm fitment with the VIN.
2. DPF Clogging and Regeneration Problems
The diesel particulate filter is the single most common source of LMM complaints. The DPF is a ceramic honeycomb that traps soot from the exhaust. As soot accumulates, the engine control module (ECM) monitors the pressure difference across the filter. When the soot load reaches a threshold, the ECM triggers an active regeneration: it raises exhaust temperature, mainly by adding fuel late in the injection event so that it burns in the DOC, and the heat burns the trapped soot into ash.
That process works well on a truck that spends time at highway speed. It works poorly on a truck that makes short trips, idles for long periods, or gets shut off in the middle of a regen cycle. An active regeneration on the LMM generally needs sustained driving above roughly 30 mph for around 30 minutes to finish. Every interrupted regen leaves the filter more loaded than before, and the ECM tries again sooner, which adds more fuel to the oil and more heat cycles to the exhaust system.
Symptoms of a Clogged or Failing LMM DPF
- A "Reduced Engine Power" message or limp mode, especially after several short trips.
- Regeneration cycles happening far more often than normal, sometimes every 100 to 200 miles.
- A noticeable drop in fuel economy that does not match driving conditions.
- Higher exhaust gas temperatures and sluggish throttle response under load.
- Rising engine oil level on the dipstick between changes, a sign of fuel dilution from repeated regens.
- Trouble codes such as P2463 (DPF soot accumulation) and P244B (DPF differential pressure too high).
Why LMM DPFs Clog
Soot itself is not the long-term problem, because regeneration burns it off. Ash is. Ash comes mostly from additives in engine oil that burn in the cylinders, and it cannot be removed by regeneration. Over time, ash fills the filter channels and reduces the filter's usable capacity. An LMM with high oil consumption, an oil leak into the intake, or a leaking EGR cooler that allows coolant into the exhaust will load ash much faster than a healthy engine.
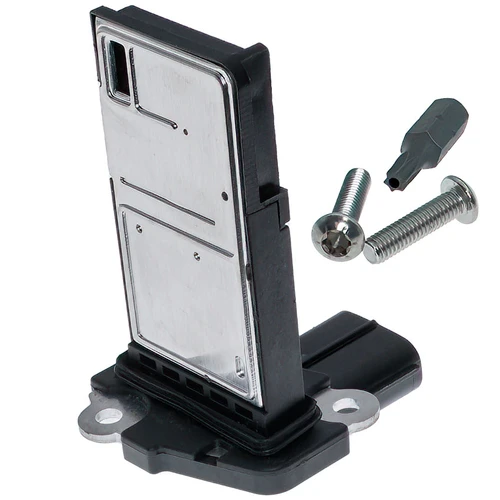
Upstream problems also cause DPF trouble. A leaking injector sends unburned fuel and heavy soot into the exhaust. A sticking EGR valve or a failing mass airflow sensor upsets the air-fuel ratio. A faulty exhaust gas temperature sensor or a cracked DPF pressure sensor hose can prevent regeneration from starting at all. Replacing a DPF without finding the reason it clogged usually means replacing it again.
Passive and Active Regeneration
The LMM can burn soot in two ways. Passive regeneration happens on its own whenever exhaust temperatures stay high enough, such as during sustained towing or long highway pulls. The DOC helps by converting nitrogen oxide in the exhaust, which assists in oxidizing soot at lower temperatures than open flame would need. Trucks that work hard every day often clean their own filters this way and rarely need active regenerations at all.
Active regeneration is the ECM's backup plan for trucks that never get hot enough. It is effective, but it carries costs: extra fuel consumption, extra heat in the exhaust system, and fuel dilution in the oil. An owner who understands the difference can often reduce active regen frequency simply by changing how the truck is used, such as combining errands into one longer drive or hooking up the trailer for a highway run instead of idling in the driveway.
DPF Cleaning Versus Replacement
Once ash fills a meaningful share of the filter, no amount of regeneration will restore it. At that point the choice is between professional cleaning and replacement. Cleaning services remove the filter, blow out ash with controlled air, and often bake the filter to burn off remaining soot before flow testing it. A filter with a cracked or melted substrate cannot be cleaned and must be replaced.
- Cleaning is usually far less expensive than a new filter and works well on an intact substrate.
- A cracked substrate often shows up as soot downstream of the DPF and an unusually low differential pressure reading.
- Melted substrate typically follows an uncontrolled regeneration caused by excessive soot loading.
- After cleaning or replacing the filter, the ash and soot learned values need to be reset with a scan tool.
Fixing DPF and Regen Problems
- Scan the truck and record soot load, differential pressure readings, and regen history before replacing anything.
- Inspect the differential pressure sensor hoses for cracks, melting, or blockage. Hose failures are inexpensive and common.
- Check all exhaust gas temperature sensors for plausible readings.
- Rule out injector leakage, EGR faults, and boost leaks, since each one increases soot production.
- If the soot load is high but the filter is otherwise sound, a service regeneration commanded with a scan tool often clears it.
- If ash loading is the issue, the filter can be professionally cleaned or replaced.
- Change the oil and verify the level after any period of frequent regens to address fuel dilution.
One important note on DPF removal: deleting or disabling the DPF or any other emissions equipment on a road vehicle violates the federal Clean Air Act and many state laws. Beyond the legal exposure, a deleted truck can be difficult to sell, register, or insure in many areas. The better long-term solution is to keep the system healthy and fix the upstream causes of excess soot.
3. EGR Valve, EGR Cooler, and Intake Soot Buildup
The LMM's exhaust gas recirculation system routes a portion of exhaust gas through a coolant-cooled EGR cooler and back into the intake to lower combustion temperatures and reduce nitrogen oxide emissions. The LMM calibration uses more EGR than the LBZ, and that extra flow brings extra soot into places it eventually causes trouble.
EGR Valve Sticking
Soot in the EGR stream mixes with oily vapor from the crankcase ventilation system and forms a thick, sticky deposit. That deposit builds on the EGR valve pintle and seat until the valve sticks open, sticks closed, or responds too slowly for the ECM. A valve stuck open dumps exhaust into the intake under load, causing black smoke and low power. A valve stuck closed sets flow codes and can raise combustion temperatures.
- Common codes include P0401 (EGR flow insufficient), P0404 (EGR position range or performance), and P0405 or P0406 (EGR position sensor circuit).
- Symptoms include rough idle, hesitation, black smoke, and poor fuel economy.
- Many sticking valves can be cleaned and returned to service. Valves with failed position sensors or worn actuators need replacement.
EGR Cooler Plugging and Leaks
The EGR cooler on an LMM faces two failure modes. The first is plugging, where soot fills the cooler passages and reduces flow until P0401 sets. The second, and more expensive, is internal leakage. Repeated heat cycles fatigue the cooler's internal tubes until one cracks. Once that happens, engine coolant leaks into the exhaust stream and is carried into the intake or out the tailpipe.
An internally leaking EGR cooler is one of the most damaging problems an LMM can develop, because the coolant it releases goes on to hurt other parts. Coolant mixed with soot forms a gummy deposit that can glue the turbocharger's variable vanes in place. Coolant reaching the DPF adds ash and can damage the substrate. In severe cases, enough coolant collects in a cylinder to cause hydrolock.
- Coolant loss with no visible external leak.
- White smoke or steam from the tailpipe, often with a sweet smell, especially at startup.
- Pressurized coolant reservoir or air bubbles in the coolant.
- Rising soot loads and frequent regens that follow a period of coolant loss.
Diagnosing an LMM EGR Cooler
Confirming an internal EGR cooler leak takes more than watching for steam. White smoke can also come from injector problems or cold-start conditions, and coolant loss can come from several external sources. A methodical approach avoids replacing an expensive cooler that was never leaking.
- Pressure test the cooling system with the engine cold, then again at operating temperature.
- Check for coolant residue inside the EGR outlet tube and intake piping.
- Run a combustion gas test on the coolant to check for exhaust gases.
- Remove and pressure test the cooler itself if the other tests point toward it.
- Inspect the turbocharger inlet and intake for signs of coolant contamination.
A plugged cooler with no internal leak can sometimes be cleaned, but cleaning rarely restores full flow on a heavily loaded unit, and it does nothing for tubes already weakened by heat cycling. On a high-mileage truck, replacement is usually the more dependable repair, particularly if the truck has already shown signs of overheating or coolant loss.
Intake Manifold and Throttle Valve Soot
The same soot-and-oil mixture that sticks EGR valves also coats the intake manifold, intake runners, and throttle valve. On high-mileage LMM trucks, the intake can lose a meaningful portion of its cross-section. The engine feels flat, smokes more, and generates still more soot, which feeds the DPF problem. Cleaning the intake tract is labor-intensive but often restores noticeable throttle response.
When an EGR cooler fails, replace it with a quality unit, flush the cooling system, refill with the correct DEX-COOL specification coolant, and inspect the turbocharger and intake for coolant residue before returning the truck to service. Bostech Auto supplies EGR coolers and related components for Duramax applications, and our technical team can help confirm the right part for your VIN.
4. LMM Fuel Injector Problems
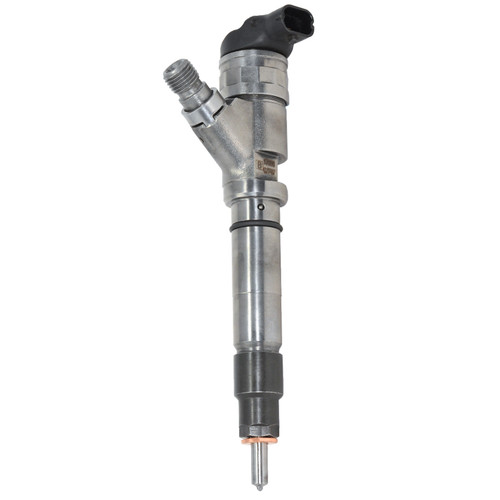
The LMM uses the same basic Bosch solenoid injector design introduced on the LBZ. These injectors sit outside the valve covers, a change GM made after the LB7's injector troubles, which makes them far easier to service than the original Duramax units. They are also far more durable than LB7 injectors. That does not make them immune to failure, and at high mileage, injector wear is one of the most common reasons an LMM loses power, smokes, or starts hard.
On an LMM, failing injectors can be harder to spot than on a pre-emissions Duramax. The DPF captures the black smoke that would normally announce a problem, so the first sign of injector trouble is often a sudden increase in regeneration frequency rather than visible smoke from the tailpipe.
Symptoms of Failing LMM Injectors
- Hard starting or extended cranking, particularly when the engine is hot.
- Rough idle, a miss, or a light knock that appears and disappears.
- Low fuel rail pressure codes such as P0087, caused by excessive return leakage.
- Frequent DPF regeneration cycles with no other obvious cause.
- Oil level climbing between changes from fuel entering the crankcase.
- Reduced power and higher fuel consumption.
Testing LMM Injectors
Two tests tell you most of what you need to know. The first is a balance rate check using a capable scan tool. The ECM adjusts fuel delivery to each cylinder to smooth out crankshaft speed, and the size of that correction shows how far each injector has drifted from the others. Balance rates should be checked at a warm idle with accessories off. An injector that needs a much larger correction than its neighbors, roughly beyond plus or minus 4 mm3, deserves a closer look.
The second is a return flow test, which measures how much fuel each injector sends back through the return line. Excessive return leakage starves the rail of pressure, which is why a single badly leaking injector can cause a no-start or a P0087. Return flow testing also helps separate injector problems from CP3 pump problems, since both can produce low rail pressure.
- Check balance rates warm, at idle, with no electrical loads.
- Perform a return flow test to measure leakage cylinder by cylinder.
- Compare commanded and actual rail pressure during cranking and under load.
- Inspect the high-pressure lines for corrosion, chafing, and leaks at the fittings.
- Check the return lines and fittings for cracks, which are common on high-mileage trucks.
Replacing LMM Injectors
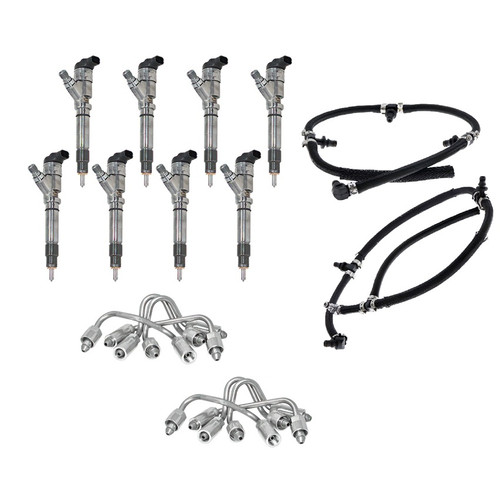
Most technicians recommend replacing all eight injectors at once on a high-mileage LMM instead of one or two. When several injectors have similar mileage and similar wear, replacing only the worst one tends to bring the truck back within weeks for the next one. A full set also gives the ECM a consistent baseline.
Replace the high-pressure injection lines with the injectors. Factory LBZ and LMM lines are prone to internal corrosion, and debris from a deteriorating line can damage brand-new injectors in short order. New return lines, fittings, O-rings, and copper sealing washers are inexpensive insurance on a job this involved. For cross-referencing, the common Bosch remanufactured LMM injector number is 0 986 435 520, which corresponds to GM 97780360.
Bostech Auto offers remanufactured Duramax injectors built and tested to OE specifications. Call 1-800-868-0057 to confirm the correct injector for your truck and to ask about complete injector kits. If you are working on an earlier truck, our LB7 Duramax Injector Failure guide covers the very different failure pattern of the 2001-2004 engine.
Injector Installation Tips
Injector jobs on the LMM are far simpler than on the LB7, but small mistakes still cause comebacks. Cleanliness is the first rule. Any dirt that enters an open high-pressure fitting goes straight into the new injector. Cap every opening as soon as it is exposed, and clean the area around each injector before removal.
- Clean the injector bores and seats thoroughly before installing new injectors.
- Always use new copper sealing washers. A reused washer can leak combustion gas.
- Torque injector hold-downs and high-pressure line fittings to factory specification.
- Prime the fuel system completely before attempting to start the engine.
- Recheck balance rates after a short drive to confirm even fueling.
5. CP3 Injection Pump Wear and Low Rail Pressure
The LMM was the last Duramax to use the Bosch CP3 high-pressure pump. That matters, because the CP3 has a much better track record than the CP4.2 pump GM adopted for the LML. A CP3 can wear and lose output with age, but it rarely fails catastrophically and rarely sends metal through the entire fuel system the way a failed CP4 can.
CP3 wear on an LMM usually shows up as gradually weakening rail pressure. The truck may run normally at light load but set P0087 when pulling a trailer or climbing a grade, or it may crank longer than normal before it fires. Contaminated fuel, water in the fuel, and running the tank dry all accelerate pump wear.
- Verify the fuel filter is fresh and correct before testing the pump. A restricted filter mimics a weak pump.
- Check the fuel pressure regulator and rail pressure sensor readings for plausibility.
- Rule out injector return leakage, which is the more common cause of low rail pressure.
- Inspect the fuel tank and lines for water, rust, or debris if pump wear seems premature.
- Replace the CP3 only after the injectors and supply side have been confirmed healthy.
Fuel Supply on the LMM
From the factory, the LMM does not use an electric lift pump. The CP3 draws fuel from the tank through the fuel filter and water separator using its own internal gear pump. That design works, but it means any restriction on the supply side, such as a plugged filter, a pinched line, or an air leak at the filter head, forces the pump to work harder and can reduce rail pressure under load.
Air leaks are a frequent cause of hard-to-trace rough running and low rail pressure on older Duramax trucks. Check the filter head, the primer, and the supply line connections for signs of air intrusion before blaming the pump. Some owners add an aftermarket lift pump to reduce the load on the CP3, especially on trucks that tow heavily or run higher fueling.
Because the CP3 is so durable compared with the CP4, it is the pump many LML owners install through a CP3 conversion. If you are shopping between generations, our CP4 Fuel Pump Failure guide explains why the LMM's pump is one of its biggest advantages.
6. VGT Turbocharger Vane Sticking and Up-Pipe Leaks
The LMM's Garrett variable geometry turbocharger uses a ring of movable vanes on the turbine side to control boost across the rpm range. A unison ring moves all the vanes together, driven by an actuator that the ECM controls through the VGT solenoid. When soot and carbon build up on the vanes, pivots, and unison ring, the mechanism stops moving freely.
The LMM is more prone to vane sticking than the LBZ because its higher EGR rates and regeneration cycles create more soot and more heat cycling in the turbine housing. Coolant from a leaking EGR cooler makes the problem dramatically worse by turning loose soot into a hard, sticky deposit.
Symptoms of Sticking VGT Vanes
- Overboost or underboost codes, including P0299 (turbo underboost) and P0234 (overboost).
- VGT position or control codes such as P0046 and P2563.
- Sluggish response off idle, or sudden surges of boost during acceleration.
- Black smoke under load when boost falls short of what the ECM is commanding.
Diagnosis and Repair
Start with the electrical side. The VGT solenoid on Duramax engines typically measures between 3.4 and 4.2 ohms at about 73 degrees Fahrenheit. If the solenoid tests within specification but the vanes still do not respond, the problem is mechanical. In many cases, removing the turbocharger, cleaning the vanes, pivots, and unison ring, and reassembling with high-temperature anti-seize restores normal operation. Turbos with worn shafts, damaged wheels, or excessive play need replacement or a complete rebuild.
Do not overlook the up-pipes. The bellows sections in Duramax up-pipes can crack or blow out, and an exhaust leak ahead of the turbo robs the turbine of energy. The symptoms look almost identical to a weak or sticking turbo. Many trucks have had turbos replaced for underboost codes that were caused by a failed up-pipe bellows. Our Duramax Turbo Problems troubleshooting guide walks through these tests generation by generation.
Turbo Oil Supply and Bearing Wear
Not every LMM turbo problem is about vanes. Shaft play, oil leaks into the compressor or turbine housing, and damaged wheels all occur on high-mileage units. Excessive crankcase pressure, a restricted oil drain, or poor oil change habits shorten turbo bearing life. A turbo that is pushing oil into the intake or exhaust can also add to DPF ash loading.
- Check for radial and axial shaft play with the intake and exhaust disconnected.
- Look for oil in the intercooler piping and at the turbo outlet.
- Inspect the oil feed and drain lines for restriction or damage.
- Replace any turbo with wheel contact, bent blades, or excessive play rather than cleaning it.
7. Coolant Loss: Water Pump, Turbo Coolant Lines, and Hidden Leaks
Unexplained coolant loss is common on high-mileage LMM trucks, and it can come from several places. Because one possible source, the EGR cooler, can cause serious secondary damage, every case of coolant loss on an LMM deserves a proper diagnosis instead of a habit of topping off the reservoir.
- Water pump weep hole: As the pump seal wears, coolant seeps from the weep hole and leaves residue or drips below the pump.
- Water pump hard-pipe O-ring: The coolant pipe connection at the pump can seep as its O-ring ages.
- Turbo coolant lines: The small lines that feed and return coolant from the turbocharger can crack and leak only when the system is hot and pressurized, often leaving coolant on top of the passenger-side head.
- Coolant crossover and hose connections: Gaskets and clamps at the crossover and heater hose fittings can weep with age.
- EGR cooler: Internal leaks consume coolant with no external evidence at all.
The most efficient way to find an LMM coolant leak is a pressure test performed both cold and at operating temperature, followed by a careful inspection of the pump, the turbo lines, and the EGR cooler joints. If the system holds pressure externally but still loses coolant, focus on the EGR cooler. A combustion leak test on the coolant can help confirm it.
When replacing an LMM water pump, replace the hard-pipe O-ring and inspect the thermostats and hoses at the same time. Bostech Auto carries Duramax water pumps and cooling components, and our team can help you put together a complete cooling system repair so you only do the job once.
Choosing the Right Coolant
GM specified DEX-COOL extended-life coolant for the LMM. Mixing incompatible coolant types can lead to sludge, reduced corrosion protection, and premature water pump seal wear. After any cooling system repair, flush the system completely and refill with the correct coolant at the proper concentration. Bleed air from the system carefully, since trapped air can cause localized overheating and erratic temperature readings.
8. Transmission Cooler Line Leaks
The LMM is paired with the Allison 1000 six-speed automatic, a transmission with an excellent reputation. Its weak point on these trucks is not internal. It is the factory transmission cooler lines, which are well known for leaking at the crimped connections between the rubber and steel sections.
A leak usually begins as a light seep at the crimp and gradually worsens. Because the lines run near the radiator and along the engine, a slow ATF leak can go unnoticed until fluid level drops enough to affect shift quality. Some owners report that dealers replaced their lines under a GM service campaign, so it is worth checking whether your VIN had open coverage before paying for the repair.
- Inspect both cooler lines at every crimp connection for wetness or red fluid residue.
- Check the transmission fluid level with the engine running at operating temperature.
- Replace leaking lines with updated OE lines or a quality aftermarket line kit.
- Hold the cooler fitting with a backup wrench during removal to avoid damaging the cooler.
- Service the fittings at the radiator one at a time, since they also retain the internal cooler coil.
While you are under the truck, it is also worth checking the Allison's fluid condition and service history. Heavy towing generates heat, and fluid that has darkened or smells burnt calls for a change sooner rather than later. The transmission itself is very durable at stock power levels, but low fluid from a cooler line leak is one of the few things that can damage it quickly.
9. Glow Plug and Glow Plug Controller Failures
LMM glow plugs and the glow plug control module are not high-failure parts compared with the DPF or injectors, but they cause a recognizable set of complaints. Early LMM trucks in particular had some glow plug and calibration issues that GM addressed with updates.
Failed glow plugs cause hard starts in cold weather, white smoke and a rough run for the first minute after a cold start, and codes in the P0671 through P0678 range that identify the affected cylinder. A failed glow plug controller can disable every plug at once.
- Test glow plug resistance and current draw before replacing plugs.
- Use penetrating oil and patience during removal, because seized glow plugs can break off in the head.
- Inspect the glow plug harness and connectors for heat damage and corrosion.
- Check for software updates if starting complaints persist after hardware repairs.
10. Piston Cracking on Modified LMM Engines
A stock LMM piston is not a weak point at factory power levels. The problem appears on trucks that have been tuned well beyond stock output, usually north of 600 horsepower. The factory injector spray pattern can create hot spots near the wrist pin area at high fueling levels, and sustained heat there can crack the piston. The LBZ has a similar reputation at similar power levels.
For the typical owner who tows and drives a stock or mildly modified truck, this is not a concern. For buyers, it is a good reason to ask directly about tuning history. A truck that has spent years at very high power levels may have hidden piston damage that shows up as excessive blow-by, oil consumption, and crankcase pressure.
- Ask for tuning history and receipts on any modified LMM.
- Check for heavy blow-by at the oil fill with the engine idling.
- Watch for oil consumption, which also accelerates DPF ash loading.
- A compression or leak-down test is worthwhile on any truck with an aggressive tuning history.
11. LMM Duramax Trouble Code Quick Reference
Trouble codes do not diagnose a truck on their own, but they point you toward the right system. The codes below are among the most common on LMM trucks. Always confirm a diagnosis with live data and testing before ordering parts, because many of these codes can be set by more than one fault.
- P0087 (fuel rail pressure too low): Injector return leakage, a restricted fuel filter, a weak CP3, or a supply-side problem.
- P0299 (turbo underboost): Sticking VGT vanes, a boost leak, a failed up-pipe bellows, or a VGT control fault.
- P0401 (EGR flow insufficient): A plugged EGR cooler or a sticking EGR valve.
- P0404 and P0405 (EGR position faults): EGR valve sticking or position sensor failure.
- P0046 and P2563 (VGT control and position): Solenoid failure, wiring faults, or mechanically stuck vanes.
- P2463 (DPF soot accumulation): Incomplete regenerations, excess soot from upstream faults, or a loaded filter.
- P244B (DPF differential pressure too high): A restricted filter or a faulty pressure sensor or hose.
- P0671 through P0678 (glow plug circuits): A failed glow plug, harness fault, or controller problem.
When several codes appear together, work upstream first. A leaking injector or stuck EGR valve can set DPF codes, and fixing the DPF without fixing the source only resets the clock.
12. The LMM Maintenance Plan That Prevents Most Failures
Most expensive LMM repairs are the end result of small problems left alone. A disciplined maintenance routine keeps soot production low, keeps the fuel system clean, and catches leaks while they are still inexpensive to fix. The following schedule is a practical baseline for a truck in normal towing and daily use. Severe service, frequent idling, and dusty conditions call for shorter intervals.
- Engine oil and filter: Change on schedule using a CJ-4 or newer low-ash oil that meets GM's diesel specification. Low-ash oil slows DPF ash loading.
- Oil level checks: Check the dipstick regularly. A rising level means fuel dilution and calls for an earlier oil change.
- Fuel filter: Replace about every 15,000 miles, or sooner with questionable fuel. Drain the water separator at every oil change.
- Air filter: Inspect often and replace as needed. A restricted air filter increases soot.
- Coolant: Check level and condition regularly. Investigate any coolant loss promptly.
- Highway driving: Give the truck regular sustained highway runs so regenerations can finish.
- Scan tool checks: Periodically review soot load, regen frequency, and injector balance rates to catch trends early.
Driving habits matter as much as service intervals. Avoid shutting the engine off during an active regeneration whenever possible. If your truck mostly makes short trips, plan a longer highway drive every week or two. Long periods of idling produce soot without producing enough heat to burn it, so limit idle time when you can.
Fuel Dilution and Oil Analysis
Fuel dilution deserves special attention on the LMM because regeneration routinely adds small amounts of fuel to the oil. A little dilution is normal for a DPF-equipped diesel. Large amounts thin the oil, reduce its ability to protect bearings, and raise the oil level on the dipstick. Trucks with frequent interrupted regens, leaking injectors, or long idle periods see the most dilution.
An oil analysis every few changes is an inexpensive way to track what is happening inside the engine. It reports fuel dilution, coolant contamination, soot levels, and wear metals. Rising fuel content points toward regen or injector problems. Glycol in the oil points toward a coolant leak. Rising wear metals warn of internal wear long before it becomes a noise.
- Send an oil sample to a reputable lab every second or third oil change.
- Track trends over time rather than reacting to a single result.
- Shorten oil change intervals if fuel dilution stays elevated.
- Investigate any sign of coolant in the oil immediately.
Cold Weather Operation
Winter adds its own stresses to an LMM. Cold starts put more demand on the glow plugs and batteries, fuel can gel if it is not treated or blended for the season, and short winter trips make it even harder for the DPF to complete regenerations. A block heater makes a large difference in cold climates, shortening warmup time and reducing the soot produced while the engine is cold.
- Use the block heater whenever temperatures drop well below freezing.
- Use winter-blend fuel or an anti-gel additive in cold climates.
- Keep batteries tested and terminals clean, since slow cranking makes starting harder on worn injectors.
- Avoid extended idling to warm the truck, which produces soot without enough heat to burn it.
- Drain the water separator more often in winter to keep water from freezing in the filter housing.
13. Buying a Used LMM Duramax: Inspection Checklist
A used LMM can be an excellent truck. The CP3 pump, the strong bottom end, and the Allison six-speed are all real advantages over later engines. The risk lies in the emissions system and in how the previous owner drove and maintained the truck. A thorough inspection takes about an hour and can save thousands.
Paperwork and History
- Ask for maintenance records, especially oil, fuel filter, and coolant service.
- Ask whether the injectors, EGR cooler, DPF, or turbo have ever been replaced, and when.
- Ask directly whether the truck has been tuned or had emissions equipment removed or disabled.
- Check whether the VIN has any open recalls or service campaigns.
Under the Hood and Underneath
Look for coolant residue around the water pump, the turbo coolant lines, and the EGR cooler joints. Check the coolant level and look at the coolant's color. Inspect both transmission cooler lines at the crimp connections. Pull the oil dipstick and note whether the level is above the full mark or the oil smells strongly of fuel. Look at the high-pressure fuel lines and injector return lines for corrosion and wetness.
Scan Tool Checks
- Read stored, pending, and permanent codes.
- Check injector balance rates at a warm idle.
- Review DPF soot load, differential pressure, and regeneration history.
- Compare commanded and actual rail pressure.
- Watch desired versus actual boost and VGT position during a test drive.
Test Drive
Start the engine cold if possible and watch for white smoke, rough running, and extended cranking. On the road, check for smooth power delivery, consistent boost, and crisp Allison shifts. After the drive, look under the truck for fresh drips and check the coolant reservoir again. A truck that passes all of these checks is likely a sound purchase. If you are comparing the LMM with other generations before you buy, our LLY vs LBZ vs LMM vs LML Duramax Buyer Comparison lays out the tradeoffs side by side.
Red Flags That Should Lower the Price or End the Deal
Some findings simply mean the truck needs work that should be reflected in the price. Others suggest a pattern of neglect that makes the truck a poor gamble. Coolant loss with no visible leak, a strong fuel smell in the oil, frequent regens shown in the scan data, and widely spread injector balance rates all point toward repairs in the near future. Missing or disabled emissions equipment can make the truck difficult to register or sell in many states.
- Evidence of emissions equipment removal or tampering.
- Coolant in the oil, oil in the coolant, or a pressurized coolant reservoir.
- Heavy blow-by or oil consumption on a high-mileage or heavily tuned truck.
- Multiple stored codes across the EGR, DPF, and fuel systems at the same time.
- A seller who cannot explain gaps in the maintenance history.
14. Repairing an LMM the Right Way: Parts and Support From Bostech
The most common mistake on an LMM is repairing the part that set the code instead of the system that caused it. A clogged DPF is often the downstream result of a leaking injector. A stuck turbo is often the result of a leaking EGR cooler. A failed set of new injectors is often the result of reused, corroded high-pressure lines. Each of these repairs costs far more the second time around.
- Pair injector replacement with new high-pressure lines, return lines, and seals.
- Pair EGR cooler replacement with a cooling system flush and an inspection of the turbo and intake.
- Pair turbo service with an up-pipe inspection and an EGR system check.
- Pair DPF service with a review of injector balance rates, EGR operation, and oil consumption.
- Pair water pump replacement with new O-rings, thermostats, and fresh coolant.
Bostech Auto supplies remanufactured and new diesel components for Duramax engines, including fuel injectors, EGR coolers, turbochargers and turbo components, and water pumps. Every part is built to meet or exceed OE specifications, and our technical team can help you identify the complete set of parts for a repair so the job gets done once. Browse the catalog at bostechauto.com, call 1-800-868-0057, or email customerservice@bostechauto.com for fitment help.
When an LMM Is Worth Major Repairs
Because the LMM block and rotating assembly are so durable, a high-mileage truck with a sound engine is usually worth repairing even when the bill includes injectors, an EGR cooler, and a turbo service at the same time. The decision changes when the engine itself shows serious internal wear, such as heavy blow-by, coolant in the oil from a failed head gasket, or a cracked piston. In those cases, compare the cost of the full repair with the cost of a replacement long block and the value of the truck before committing.
Whatever the scope, plan the repair as a system and buy every part you need before the truck comes apart. If you are unsure which components belong in your repair, our team at Bostech Auto can walk through the symptoms with you and recommend a complete parts list.
15. Frequently Asked Questions
The most common LMM problems are DPF clogging and incomplete regenerations, EGR valve and EGR cooler failures, injector wear, sticking VGT turbo vanes, coolant leaks from the water pump and turbo coolant lines, and leaking transmission cooler lines. Nearly all of them relate to the emissions system or to normal wear on high-mileage trucks rather than to weaknesses in the engine block or rotating assembly.
Yes. The LMM shares its core design with the highly regarded LBZ and keeps the durable CP3 injection pump. Its reliability depends heavily on how the DPF and EGR systems have been maintained and how the truck has been driven. Well-maintained LMM trucks frequently exceed 300,000 miles.
The LMM was used in 2007.5 through 2010 Chevrolet Silverado HD and GMC Sierra HD trucks in the new GMT900 body style, as well as in some medium-duty and van applications. Trucks sold as 2007 "Classic" models kept the LBZ. The eighth digit of the VIN is "6" on an LMM.
Common signs include frequent regenerations, reduced power, a "Reduced Engine Power" message, poor fuel economy, and codes such as P2463 or P244B. A scan tool that reads soot load and differential pressure gives the most reliable answer. Inspect the pressure sensor hoses before condemning the filter.
An active regeneration generally needs around 30 minutes of sustained driving above roughly 30 mph to finish. Short trips and shutting the engine off mid-cycle are the main reasons regenerations fail to complete.
No. LMM injectors are mounted outside the valve covers and are far more durable than LB7 injectors. They do wear at high mileage, and when they fail they typically cause hard starts, rough running, low rail pressure codes, and more frequent DPF regenerations.
On a high-mileage truck, replacing all eight is usually the better value. Injectors with similar mileage tend to wear at similar rates, and a full set gives balanced fueling. Replace the high-pressure lines and return lines at the same time to protect the new injectors from debris.
No. The LMM uses the Bosch CP3 pump, which has a strong durability record. The CP4.2 arrived with the 2011 LML. This is one of the main reasons many buyers prefer the LMM over the LML.
The most likely cause is an internal EGR cooler leak, which sends coolant into the exhaust. Other possibilities include turbo coolant lines that leak only when hot and pressurized. A hot and cold pressure test plus a combustion leak test will narrow it down. Address it quickly, because coolant in the exhaust can damage the turbo and DPF.
Bostech Auto carries remanufactured injectors, EGR coolers, turbochargers, water pumps, and related Duramax components at bostechauto.com. For help confirming fitment or planning a complete repair, call 1-800-868-0057 or email customerservice@bostechauto.com.
16. Disclaimer
The information in this article is provided for general informational and educational purposes only. Diesel engine diagnosis and repair involve high-pressure fuel systems, high temperatures, and heavy components that can cause serious injury if handled improperly. Specifications, procedures, and trouble code definitions can vary by model year, application, and calibration, so always consult the appropriate factory service information and a qualified diesel technician before performing repairs. Modifying or removing emissions control equipment on a road vehicle may violate federal, state, and local laws. Bostech Auto is not responsible for any damage, injury, or loss resulting from the use of the information in this article.