Understanding the 6.0 Powerstroke EGR Cooler and Why It Fails
Jun 18th 2025
Table of Contents
- Introduction
- Signs and Symptoms of a Failing EGR Cooler on the 6.0 Powerstroke
- DIY EGR Cooler Replacement Guide (6.0 Powerstroke)
- Preventive Tips to Avoid Future EGR Cooler Problems
- Bringing It All Together
Introduction
The 6.0L Ford Powerstroke diesel engine is infamous for its EGR cooler issues. The EGR (Exhaust Gas Recirculation) cooler is like a small radiator that uses engine coolant to cool down exhaust gases before they re-enter the intake. Unfortunately, on the 6.0 Powerstroke, this component has a high failure rate. Owners frequently experience EGR cooler failures due to a combination of design weaknesses and related engine issues.
Why do 6.0 EGR coolers fail so often? One major reason is the engine's oil cooler. In the 6.0 Powerstroke, coolant flows through the oil cooler first and then into the EGR cooler. Over time, the stock oil cooler can become clogged with debris such as:
- Casting sand
- Rust
- Sediment in the coolant
When the oil cooler passages plug up, coolant flow to the EGR cooler is restricted. The EGR cooler then overheats due to inadequate cooling and its internal metal components can fatigue and crack. Essentially, a clogged oil cooler starves the EGR cooler of coolant, causing the EGR cooler to boil and rupture. This chain reaction is a well-known culprit behind the 6.0's EGR problems.
Another factor is the original design of the EGR cooler. The factory 6.0 cooler uses narrow internal cooling fins that are brazed (glued by metal solder) to the coolant passages. These brazed joints and thin tubes don't hold up to repeated thermal stress. Each time you accelerate and the EGR system opens, extremely hot exhaust (sometimes over 1,000°F) flows into the cooler. If coolant flow is insufficient or the cooler has a weak spot, the drastic temperature difference can crack the brazing or tubes.
Once the internal welds crack, coolant leaks internally. As Sinister Diesel (a well-known aftermarket manufacturer) explains, a cracked EGR cooler will allow coolant to be sucked into the intake manifold, and from there into the engine cylinders. This can quickly escalate from a minor leak into a major failure.
In short, the 6.0 Powerstroke EGR cooler's high failure rate is due to a perfect storm of factors:
- An easily clogged oil cooler leading to overheating
- A fin-and-brazed-tube design prone to cracking
- The extreme heat cycles of diesel exhaust
It's no surprise that EGR cooler failure is one of the most common issues 6.0 owners face. Next, we'll look at how to recognize a bad EGR cooler before it causes severe damage.
Signs and Symptoms of a Failing EGR Cooler on the 6.0 Powerstroke
How can you tell if your 6.0 Powerstroke EGR cooler is failing? Fortunately, a bad EGR cooler often exhibits some clear symptoms. Catching these warning signs early can save you from catastrophic engine damage. Here are the top troubleshooting tips and symptoms to watch for:
White Smoke (Steam) from the Exhaust
One of the hallmark signs of a leaking EGR cooler is billowing white smoke or steam coming from the tailpipe. This smoke is actually vaporized coolant entering the exhaust stream and flashing into steam. Key characteristics include:
- Most noticeable when the engine is warmed up and the EGR valve opens
- Sweet-smelling white smoke, especially under acceleration or load
- Suspect a bad EGR cooler allowing coolant into the exhaust
In severe cases, so much coolant can enter the cylinders that it hydro-locks the engine (liquid coolant cannot be compressed, causing the engine to lock up).
Unexplained Coolant Loss
Are you constantly topping off the degas bottle (coolant reservoir) with no external leaks? A cracked EGR cooler can slowly consume engine coolant by leaking it into the intake or exhaust. Signs include:
- Coolant level dropping without any visible puddles under the truck
- Missing coolant could be going out the tailpipe as steam
- Always investigate unexplained coolant loss – an EGR cooler leak is a prime suspect on the 6.0
Coolant "Puking" from Degas Bottle
Another related symptom is coolant pushing out of the degas bottle cap (often called "puking"). A failing EGR cooler can introduce exhaust gases into the coolant system or cause coolant to boil, increasing pressure. Look for:
- Traces of coolant sprayed or crusted around the degas bottle vent
- While puking coolant can also indicate head gasket issues, 6.0 owners know that a bad EGR cooler often goes hand-in-hand with this symptom
- If the truck pushes coolant only under heavy throttle (and you also have white exhaust smoke), the EGR cooler is likely at fault
Sweet Coolant Smell
You might notice a sweet, antifreeze smell inside the cab or around the truck after a hard drive. This can happen if:
- A bit of coolant leaks into the exhaust (you smell it through the vents)
- Coolant vents from the degas bottle
- The odor of burning coolant along with any of the above symptoms is a red flag for EGR cooler trouble
Visible Coolant in the Intake
A clever diagnostic tip is to remove the EGR valve (which is mounted on top of the engine, in the intake manifold crossover) and inspect the inside. The process involves:
- The EGR valve is held by two 8mm bolts; once out, shine a light into the intake
- If you see wetness or puddles of coolant in the intake manifold or on the EGR valve itself, the EGR cooler is almost certainly leaking internally. Normally, the intake should only have dry soot.
- Any wet coolant in the intake means the cooler's internals have cracked and are letting coolant flow where it shouldn't
Engine Overheating or Running Rough
In advanced cases, a bad EGR cooler can cause overheating (due to loss of coolant or air pockets in the cooling system). The engine may also run rough or misfire if coolant is entering the cylinders. For example:
- An engine that stumbles or has trouble starting after being shut off hot could be ingesting coolant (check for white smoke on startup)
- Over time, the steam created by a leaking EGR cooler can even stretch the head bolts and blow head gaskets, compounding the issues
- If your 6.0 has signs of head gasket failure along with white smoke, address the EGR cooler as a possible root cause
If you observe a combination of these symptoms – especially white exhaust smoke, coolant loss, and a wet EGR valve – you can be fairly confident the EGR cooler has failed. It's crucial to fix it promptly. Driving with a bad EGR cooler can lead to:
- Turbo damage (from moisture)
- Fouled sensors
- Engine hydrolock or cylinder damage
In the next section, we'll walk through how a determined DIYer can replace the EGR cooler and restore your 6.0 Powerstroke's reliability.
DIY EGR Cooler Replacement Guide (6.0 Powerstroke)
Replacing the EGR cooler on a 6.0 Powerstroke is a moderate-to-advanced DIY job, but it's absolutely doable with the right tools, patience, and guidance. This section will provide a detailed, step-by-step replacement guide tailored for a hands-on owner. We'll cover:
- The tools and parts you need
- The removal process
- Installation of the new cooler
- Tips to make the job go smoother
Roll up your sleeves – let's get your 6.0 back on the road with a healthy EGR cooler!
Tools and Parts You Will Need
Before you begin, gather all necessary tools and replacement parts. Nothing is worse than getting halfway through a job and realizing you're missing a crucial tool or gasket. Here's a checklist of what you'll need for a 6.0 EGR cooler replacement:
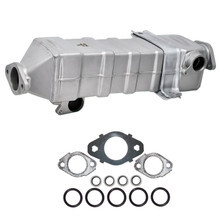
Replacement EGR Cooler:
- Ensure you have the correct EGR cooler for your year of 6.0 Powerstroke
- Ford used slightly different EGR coolers in early 2003 engines versus 2004–2007 engines (round style vs. square style)
- We recommend using an upgraded heavy-duty EGR cooler rather than an OEM-style unit, to prevent future failures
- For example, Bostech offers remanufactured 6.0 Powerstroke EGR coolers with 304 stainless steel tubing and TIG-welded construction to eliminate the failure-prone brazed seams
- Upgraded coolers like these are designed to handle the heat and stress far better than the stock part
- Check out Bostech's line of 6.0 Powerstroke EGR Coolers which come with improved core designs and often a warranty
Gasket and Seal Kit:
You will need new gaskets for the EGR cooler connections. Typically, this includes:
- An O-ring or gasket where the cooler connects to the intake manifold
- A gasket for the cooler-to-exhaust connection
- Any other seals removed during the job
- Many EGR cooler kits from Bostech include the required gaskets
- Double-check that you have these on hand, as reusing old gaskets is not recommended
Basic Hand Tools:
- A good socket set (both 8mm and 10mm sockets are commonly needed)
- Wrenches, extensions, and universal joints
- The 6.0 has tight spaces, so a swivel socket or universal joint can help reach awkward bolts
- You'll need a ratchet and possibly a breaker bar for stubborn fasteners
- Common sizes include 8mm, 10mm, 11mm, 13mm, and 15mm for various engine components
Torx and Allen Bits:
- The EGR cooler itself might not need torx bits, but related components might
- For example, the FICM (fuel injector control module) on the engine has Torx screws if you ever need to move it
- Some aftermarket EGR delete kits use Allen head plugs
- It's good to have a Torx bit set and Allen/hex bit set just in case
Pry Bar or Large Screwdriver:
- A small pry bar can help with lifting the EGR cooler out of its position once unbolted (they can be snug or stuck due to the O-rings)
- Also useful for moving the turbo or intake aside gently if needed
Drain Pan and Funnel:
- You'll need to drain some coolant from the system before removing the EGR cooler (to avoid a coolant spill into the engine or valley)
- Have a clean drain pan to catch coolant
- A funnel will help when refilling coolant later
Optional but Helpful:
- Penetrating oil (like PB Blaster) to pre-soak exhaust bolts and turbo clamps (this makes removal easier, given heat can seize them)
- Magnet on a stick (handy if you drop a bolt in the engine valley)
- Shop rags or paper towels (for cleaning up spilled fluids and preventing debris from entering open ports)
Replacement Coolant (and Oil, if doing oil cooler):
- If a significant amount of coolant is drained or lost, have the correct coolant on hand to refill (Ford-spec coolant or an ELC equivalent recommended for diesels)
- If you choose to replace the oil cooler at the same time – a smart preventative step – you'll need engine oil and filter as well, since replacing the oil cooler involves an oil change
- Many 6.0 owners replace both the oil cooler and EGR cooler together to address the root cause of failure
With tools and new parts ready, let's move on to the actual procedure. Always start with a cool engine and work methodically. Label hoses or take photos during disassembly if you're worried about remembering where everything goes.
Removing the Old EGR Cooler
Preparation and Safety:
- Park the truck on a level surface and ensure the engine is completely cool (hot coolant is dangerous to work with)
- Disconnect the negative battery cables for safety, since you'll be unplugging sensors and possibly the FICM
- Remove the engine cover/shroud if installed to improve access
Drain Coolant:
- Locate the petcock (drain valve) on the bottom of the radiator and drain about 1-2 gallons of coolant into your drain pan
- You don't need to drain the entire system, just enough so that the level is below the EGR cooler height
- This prevents a mess when you disconnect coolant lines
- Close the petcock when done
Remove Intake Components:
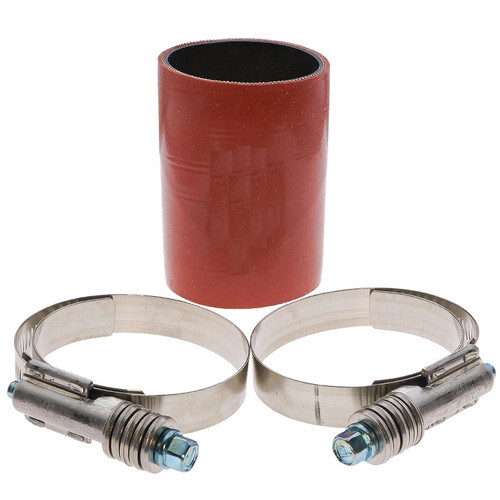
- Disconnect the air intake tubing going to the turbo
- This usually involves loosening the clamps on the intake hose and pulling the hose off the turbo inlet
- Also, disconnect the charge air cooler (intercooler) pipe from the turbo outlet (passenger side of turbo) if it's in your way
- Removing the air intake and intercooler pipe will give you room to work and a clear view of the top of the engine
Remove the Turbo (if necessary):
On 2003-2007 Powerstrokes, the turbocharger sits on top of the engine, partially above the EGR cooler. While it is technically possible on '04-'07 models to replace the EGR cooler without fully removing the intake manifold, most DIY guides will have you remove the turbo to make space. It sounds daunting, but it's a manageable step:
- Unplug the VGT solenoid connector on the turbo
- Remove the turbo mounting bolts (there are usually three: two at the front base of the turbo and one at the back securing it to a pedestal or bracket)
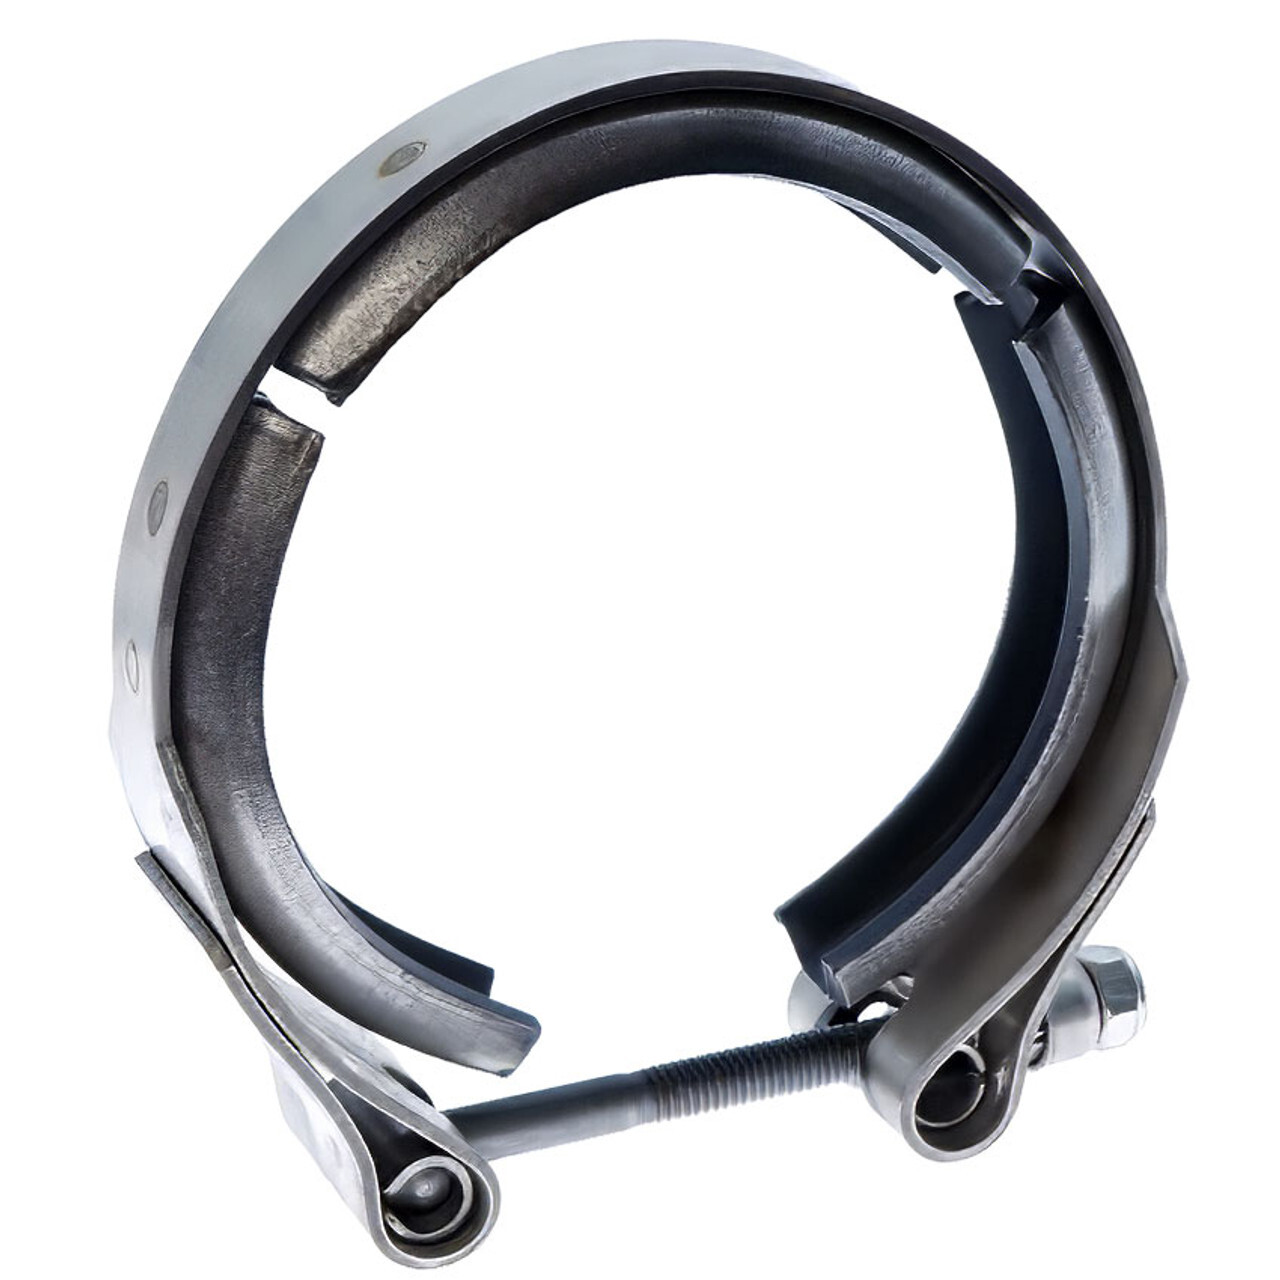
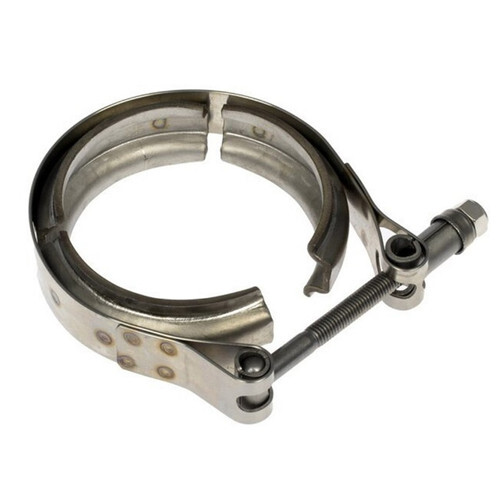
- Loosen the v-band clamp connecting the turbo to the exhaust up-pipe at the rear
- Also loosen the clamp at the turbo-to-downpipe connection
- Once the clamps and bolts are loose, you can wiggle and lift the turbo out
- Be careful – it's heavy (~40-50 lbs) – get a good grip and possibly a second set of hands
- Set the turbo aside
Removing the turbo provides clear access to the EGR cooler and the intake manifold area. You'll now see:
- The EGR valve (on the intake)
- The cooler running horizontally near the top of the engine
Remove the EGR Valve:
- It's not strictly required to remove the EGR valve to get the cooler out, but doing so provides more wiggle room and allows you to inspect for coolant
- The EGR valve is held by two small bolts
- Unplug its electrical connector, remove the bolts, and twist-pull to remove the valve
- If it's carbon-fouled, expect it to be a bit stuck (gentle prying can help)
- Note: Stuff a clean rag into the open EGR valve hole afterwards to prevent debris from falling in the intake
Disconnect EGR Cooler Lines:
The EGR cooler has a coolant supply and return. Typically:
- There's a small coolant line or hose at the front (toward the intake side) that needs to be disconnected (some models have a metal coolant line with a rubber hose and clamp)
- Clamp off the rubber hose or be ready for some residual coolant to spill when you pull it off
- Another coolant connection is at the rear of the cooler (near the exhaust up-pipe side), which may be an O-ring seal into the engine block coolant passage or a small hose – disconnect as required
- Again, have rags ready to catch any coolant drips
Unbolt the EGR Cooler:
There will be mounting bolts or brackets securing the EGR cooler in place:
- On the intake side, the cooler is attached to the intake manifold (or the EGR valve housing) with either bolts or studs and nuts
- Remove those fasteners
- On the exhaust side, the cooler attaches to the exhaust up-pipe with a flange and gasket – remove the two bolts holding the cooler to the exhaust up-pipe inlet
- Check for any additional brackets or support clamps mid-way on the cooler; remove those as well
Remove the Intake Manifold (if needed):
- In many cases, once the above is done, you can work the EGR cooler out by sliding it towards the front of the engine and lifting
- However, clearance is tight
- Some mechanics choose to remove the intake manifold/plenum for better access, especially on 2003 models or if carbon buildup is an issue
- Removing the intake involves disconnecting a few sensors and bolts around its perimeter
- If you prefer not to remove it completely, you might get away with just lifting the intake slightly or prying gently to free the cooler
- Proceed carefully to not damage the intake or other components
Extract the EGR Cooler:
- With bolts removed and connections free, the cooler itself should be free to remove
- It may still be snug in its position due to the O-rings
- Gently use a pry bar or large screwdriver to nudge it out of its seat
- Work it back and forth: disconnecting at the exhaust side and then wiggling it out of the intake side
- Eventually, the cooler will slide out
- Exercise caution if it suddenly releases and coolant spills – keep your face away and have a rag ready
When extracting the old cooler, expect some coolant spillage and be careful not to drop any debris into the open intake or coolant passages.
Inspect Removed Parts:
Once the EGR cooler is out, take a moment to inspect it:
- Often, a failed cooler will show signs of leakage – you might see a crack or evidence of coolant residue inside the cooler or at the ends
- Also inspect the EGR valve housing and intake manifold for any pooled coolant (clean this out with rags)
- If you found heavy sludge or carbon clogging the EGR cooler, that's a hint that the engine might benefit from a cleaning or that the cooler was partially clogged (which can also cause failure)
At this stage, the faulty EGR cooler is out of the truck. Congrats – the hardest part (removal) is done! The next step is to install the new cooler and reassemble everything.
Installing the New EGR Cooler
Prep the New Cooler:
- Ensure the new EGR cooler you're installing is the correct part and is ready to go
- If it came with protective caps on the openings, remove them
- It's a good idea to lightly lubricate any O-rings (with coolant or a bit of silicone grease) to help with installation
- Also, if your new cooler includes any brackets or hardware, make sure they are in place as per the instructions
- For example, some aftermarket coolers (or updated OEM kits) have different mounting hardware – have those handy
Insert the New EGR Cooler:
- Position the new cooler in the engine bay and carefully slide it into place where the old one sat
- Align the intake-side end first, inserting it into the intake manifold opening or up to its mounting point
- Then align the exhaust-side flange with the up-pipe
- It may take a bit of maneuvering to get both ends seated properly
- Be patient and avoid forcing it – you don't want to nick an O-ring or misalign the gasket
- The upgraded coolers with tubular cores are usually the same dimensions as stock for a drop-in fit, so if it's not fitting, double-check alignment
Reconnect Mounting Bolts and Clamps:
- Once the cooler is seated, reinstall the bolts that secure the cooler to the intake manifold (or EGR valve housing) and the two bolts connecting it to the exhaust up-pipe flange
- It's best to start all bolts by hand to avoid cross-threading, then tighten them evenly
- Use the new gasket on the exhaust flange connection (replace the old crushed gasket with the new one from your kit)
- Tighten the flange bolts to snug (around 15-20 lb-ft if you have a small torque wrench)
- The intake side bolts also should be snug (typically around 8-10 lb-ft if small bolts)
- If the cooler has a mid-point support bracket, reattach it as well
Reconnect Coolant Lines:
- Reattach any coolant hoses or lines to the new EGR cooler
- Replace any hose clamps that are weak; ensure a tight seal to prevent leaks
- Double-check that any O-ring sealed ports (like where a tube slides in) are fully seated
- At this point, all physical connections of the new cooler should mirror how the old one was before removal
Reinstall EGR Valve:
- Remove the rag covering the EGR valve hole
- If your EGR valve was very dirty, consider cleaning it before reinstalling (spray it with carb cleaner to remove carbon deposits, carefully avoiding getting solvent into the electrical parts, and let it dry)
- Install the EGR valve back into the intake, twisting gently to seat it, and secure with its bolts
- Plug the electrical connector back in
Reinstall the Turbocharger:
This is basically the reverse of removal:
- Carefully lower the turbocharger back into place on top of the engine
- Align it with the exhaust up-pipe and downpipe
- Reinstall the turbo mounting bolts (remember the two in front and one in the rear bracket)
- It can help to keep everything loose until all are in, then tighten them down securely (torque spec for turbo bolts is around 35-37 lb-ft)
- Tighten the V-band clamps on the exhaust up-pipe to turbo connection and the turbo downpipe connection
- Make sure these clamps sit properly on their flanges before tightening to avoid exhaust leaks
- Reconnect the VGT solenoid plug on the turbo
Reattach Intake Pipes:
- Put the charge air cooler (intercooler) pipe back onto the turbo outlet and tighten its clamp
- Reattach the air intake tube and filter assembly to the turbo inlet, tightening the clamp
- Ensure that all intake connections are tight and there are no loose clamps that could cause boost leaks
Refill Coolant:
- Double-check that all coolant drain plugs (radiator petcock) are closed
- Then refill the cooling system with the proper coolant mix
- Since you only drained a portion, you can top off the coolant reservoir to the "FULL" line
- It's wise to have extra coolant on hand in case air purges out and the level drops after the first few heat cycles
Reconnect Batteries:
- Reattach the negative battery cables that you disconnected earlier
Final Check:
Take a thorough look around the engine bay:
- Did you reconnect every sensor and hose you removed?
- Common things to double-check: the MAP sensor line on the intake, any electrical connectors near the turbo, the FICM connectors (if you moved the FICM aside during access), etc.
- Make sure no tools or rags are left in the engine bay
- Verify that the oil fill cap and dipstick are in place (in case you opened them)
With everything reassembled, you're ready to test the repair.
Post-Installation and Testing
Start the Engine and Inspect:
- Start the truck's engine and let it idle
- It may crank a bit longer than usual on the first start if some coolant went into the intake during the job (causing a brief rich condition), but it should start and run
- Immediately inspect for any leaks
- Look around the EGR cooler connections for coolant seeping, and check under the truck for any dripping coolant or oil
- Also listen for exhaust leaks at the turbo or EGR cooler junction – a ticking or whooshing sound could mean a clamp isn't tight
- If you see any leaks, shut off and address them before driving
Bleed the Cooling System:
- As the engine warms up, the thermostat will open and coolant will circulate
- Turn the cabin heater on high; this helps purge air from the system
- You may need to top off the coolant as air pockets burp out
- Keep an eye on the temperature gauge – it should stay in normal range
- After the engine reaches operating temp, shut it off and let it cool, then verify the coolant level again and add if needed
Test Drive and Monitor:
- Take the truck for a gentle test drive
- Gradually bring it up to operating temperature and a bit of boost
- Pay attention to the exhaust – white smoke should be gone if the EGR cooler was indeed the culprit
- You also should no longer smell sweet coolant, and the degas bottle should not be venting coolant
- Monitor your gauges; ensure no overheating
- It's normal after this repair to see some residual white steam for a short time (burning off any coolant that might still be in the exhaust or intake from the leak), but it should clear up quickly
- If everything looks good, drive normally and re-check for leaks after your first longer trip
Check for Codes:
- Replacing the EGR cooler itself shouldn't throw any check engine codes if all sensors (like the EGR valve) are plugged back in properly
- If you disconnected batteries, any previous codes may have cleared
- It's a good idea to scan for diagnostic trouble codes (DTCs) anyway
- If none are present and no CEL (check engine light), you're in great shape
Congratulations – you've successfully replaced the EGR cooler on your 6.0 Powerstroke! This is a big job, but by doing it yourself you likely saved a significant amount of money in labor. More importantly, you've addressed one of the most failure-prone components on the 6.0. Your truck should be running noticeably better (and no more embarrassing white smoke clouds or coolant loss).
Preventive Tips to Avoid Future EGR Cooler Problems
After going through the effort of replacing the EGR cooler, you'll want to avoid ever having to do it again. Here are some preventative measures and tips to help your new EGR cooler last as long as possible:
Address the Oil Cooler
Remember that the oil cooler is often the root cause of EGR cooler failures:
- If you didn't replace the oil cooler already, strongly consider it, especially if it's original or if you saw evidence of clogging
- An upgraded oil cooler or a thoroughly cleaned OEM one will ensure proper coolant flow to the EGR cooler
- Bostech and other suppliers offer 6.0L oil cooler kits
- Replacing it is another involved job, but it pairs well with the EGR cooler job (since you have things apart)
- At the very least, flush your coolant system to remove debris
Use a Coolant Filtration Kit
A coolant filter is an affordable add-on that continuously filters the engine coolant to catch debris before it clogs anything:
- The 6.0 Powerstroke is notorious for sand and particles left from the casting process, which circulate in coolant and accumulate in coolers
- Installing a coolant filter kit (a simple bypass filter) greatly extends the life of both the oil and EGR coolers
- It's cheap insurance and easy to install in under an hour
- This is highly recommended for all 6.0 owners
Maintain Your EGR Valve
Keep the EGR system clean:
- Periodically remove and clean the EGR valve to prevent it from sticking due to soot
- A stuck EGR valve can cause erratic temperature spikes in the cooler
- By ensuring it moves freely and closes properly, you help regulate the EGR cooler's exposure to exhaust gas
Monitor Coolant and Exhaust Temps
Watch your engine coolant temperature (ECT) and exhaust gas temperature (EGT) if you have gauges:
- Unusually high coolant temps could hint at an oil cooler issue developing
- Extremely high EGTs (from heavy towing, for example) can stress the EGR cooler
- If you tow frequently, consider dialing back tunes or using an EGT gauge to avoid sustained temps that might strain the cooler
Quality Replacement Parts
When you do repairs, use high-quality parts:
- As we emphasized, an upgraded EGR cooler (with stainless steel, TIG-welded construction) is far more robust than the stock design
- Many aftermarket options even come with long warranties (for example, some have 2-year, 5-year, or even lifetime warranties) due to improved durability
- Similarly, use the correct Ford-spec coolant (or approved equivalent) and keep it at the proper concentration – the coolant's condition itself matters for heat transfer and corrosion prevention inside the cooler
Don't Ignore Early Signs
Lastly, if you ever start seeing symptoms like those we listed:
- Whiffs of white smoke
- A slight coolant loss
- Address it immediately
Sometimes a small EGR cooler leak can be caught early – you might get away with just the cooler swap before it causes head gasket issues. Early action can save a lot of headache.
Bringing It All Together
The 6.0 Powerstroke is a powerful diesel engine with a few well-known weak points – and the EGR cooler sits near the top of that list. The good news is that by understanding the problem and following a guide like this, you can fix it and significantly improve the engine's reliability.
We've discussed:
- Why the 6.0 Powerstroke EGR cooler fails
- How to spot the warning signs
- Provided a detailed DIY replacement walkthrough
With an upgraded EGR cooler in place and some preventive maintenance, your 6.0L should be far less prone to the infamous "white smoke show" and coolant loss problems.
Remember, when choosing replacement parts, opt for quality and proven upgrades. For instance, heavy-duty EGR coolers from Bostech are built with robust stainless steel cores to avoid the factory cooler's pitfalls. (Plus, Bostech backs their EGR coolers with a solid warranty for peace of mind.)
You can browse our selection of EGR coolers and related components on our site – check out the EGR Coolers category for the right fit for your Ford Powerstroke. By tackling the EGR cooler issue head-on, you're effectively "bulletproofing" one of the most failure-prone aspects of the 6.0. Many owners find that once a durable EGR cooler (and oil cooler) are in place, the 6.0 Powerstroke becomes a much more dependable engine for years to come.
Hopefully, this guide has armed you with the knowledge and confidence to get the job done. Happy wrenching, and enjoy your revitalized 6.0 Powerstroke – with no more EGR cooler worries!