Diesel Fuel System Contamination, A Complete Diagnosis and Repair Playbook
Sep 30th 2025
Table of Contents
- Introduction
- How Contamination Happens
- Symptom Matrix: Spot Contamination Early
- Confirming Diagnosis: Tests & Inspection
- Full Remediation: What Must Be Addressed
- Step-by-Step Repair Process (Tank Forward)
- Cost Expectations & Timing
- Why Complete Kits Often Make the Most Sense
- Preventive Maintenance & Best Practice
- Post-Repair Validation & Monitoring
- Special Focus: Ram 6.7 Cummins & CP3 / CP4 Considerations
- Frequently Asked Questions
- Practical Checklist (with Internal Product Links)
- Closing Thoughts
Introduction
Diesel fuel system contamination is one of the costliest and most destructive issues a diesel owner or technician can face. Modern common rail systems run at extremely high pressures and require crystal-clean fuel. Contaminants such as water, microbes, chemical intrusion, or metal debris can wreak havoc on pumps, rails, injectors, and seals.
This guide condenses expert knowledge into a user-friendly playbook. You will learn how contamination begins, how to spot it early, how to test and confirm it, exactly which components must be addressed, how much repair typically costs, why complete kits may be the best path, and how to prevent recurrence. Whether managing a fleet, working in a shop, or handling DIY repairs, this is your reference to avoid expensive mistakes and comebacks.
How Contamination Happens
Understanding entry routes and mechanisms is key. Every contamination event has a starting point. Fixing the symptom without removing the root cause invites repeat failures.
Water Intrusion
Water is by far the most common contaminant. It enters fuel systems through condensation inside partially filled tanks, seepage at fuel fill points, or aging infrastructure at fuel stations. Diesel’s reduced natural lubricity (especially with ultra low sulfur diesel) means water presence drastically reduces protection for pump components and increases friction and wear. Once wear debris begins, it circulates throughout the system and accelerates damage.
Microbial Growth (Diesel Bug)
At the interface of water and diesel, bacteria, fungi, and yeasts flourish. These microorganisms consume hydrocarbons and excrete acidic byproducts that corrode metals and generate slimy biomass. The slime clogs filters and traps water and debris in microscopic niches, accelerating degradation. Diesel blends with biodiesel content (B5, B10, etc.) are especially vulnerable due to the FAME compounds.
DEF Contamination
Diesel exhaust fluid (urea solution) entering the fuel is catastrophic. Even trace amounts of urea crystallize and cause deposits that disable injectors and pumps. The water content removes lubricity. Corrosion begins immediately against aluminum, brass, copper, and other common fuel system metals. If you suspect DEF contamination, do not start the engine. The only proper response is tank removal and full remediation.
Metal Wear Debris
As engines age or components begin failing, microscopic wear particles appear. A failing high pressure pump or injector can shed metal, which then circulates through the system. CP4 pumps (common in many modern diesels) are especially vulnerable, with tighter tolerances and higher sensitivity to fuel quality. Once metal is in motion, the cycle accelerates—damaged parts produce more debris that damages other parts in turn.
Platforms Especially at Risk
While contamination can affect any diesel, some platforms see it more frequently because of component design, popularity, or exposure:
- Ram 6.7 Cummins (2013–2018): Many used the CP4.2 pump, which has higher failure and contamination risk.
- Ford 6.7 Powerstroke (2011+): CP4 designs in these engines have caused repeated contamination events.
- GM Duramax 6.6 (LML, L5P, etc.): Similar patterns follow CP4 components.
- Older engines with CP3 pumps are more tolerant but still vulnerable to water or biological intrusion.
- Heavy duty engines (Cummins ISX/ISB, Detroit DD, Paccar MX) face greater fuel demands, irregular fuel quality, and longer intervals, which increases contamination exposure.
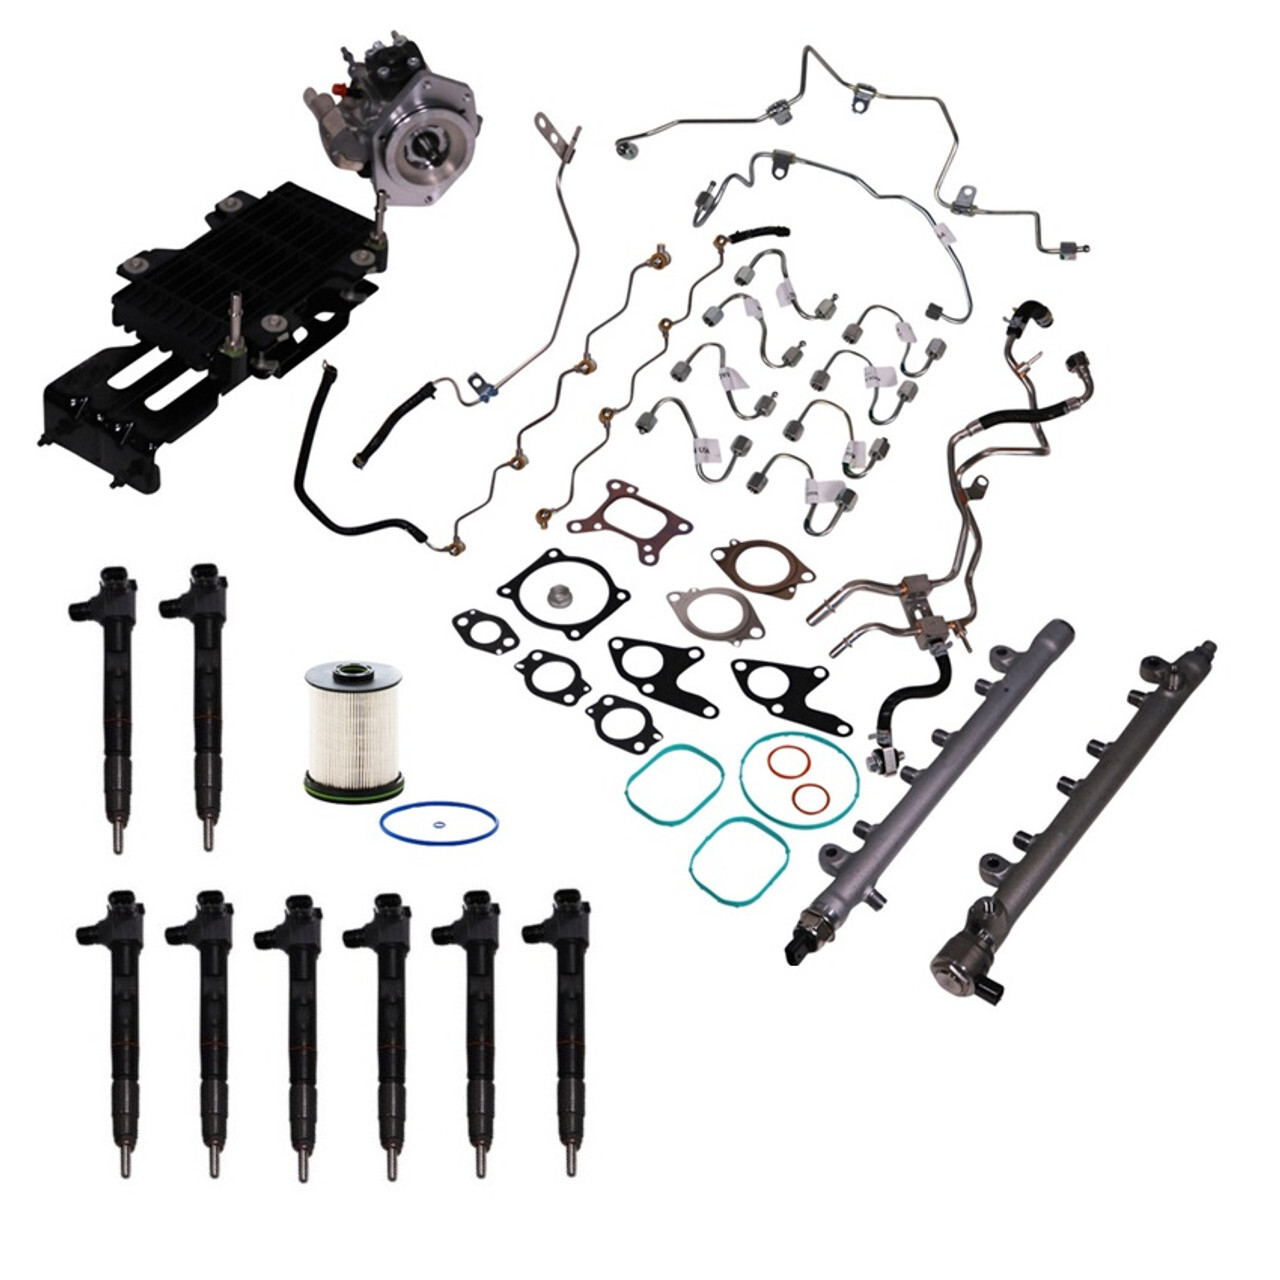
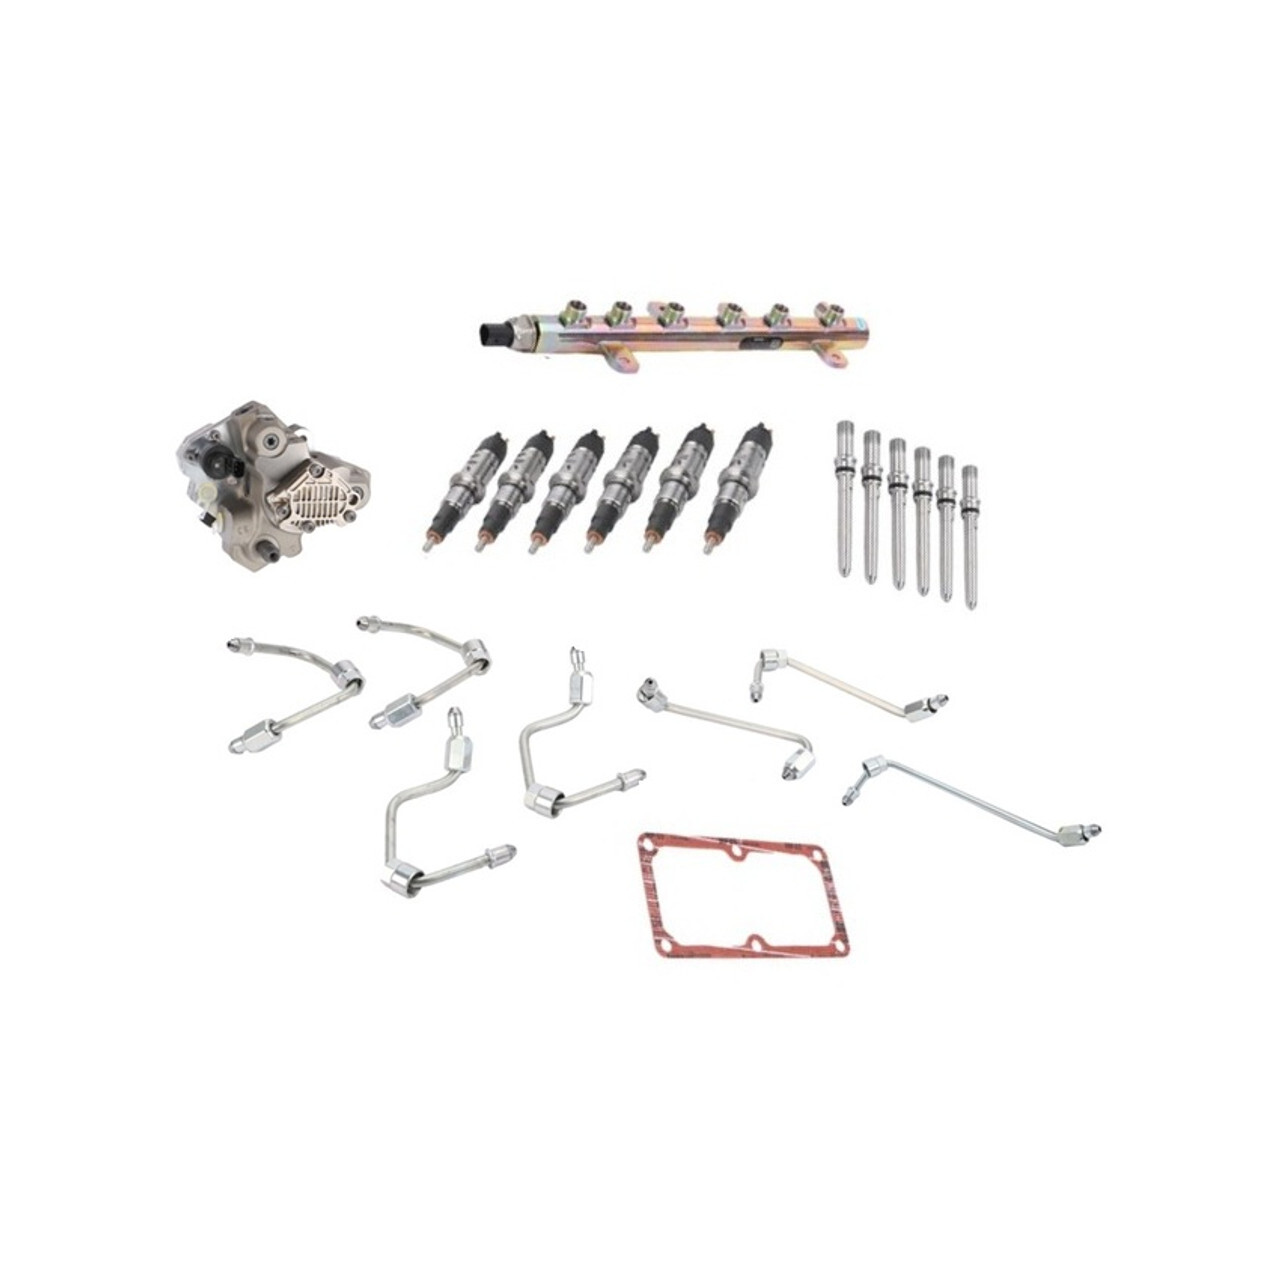
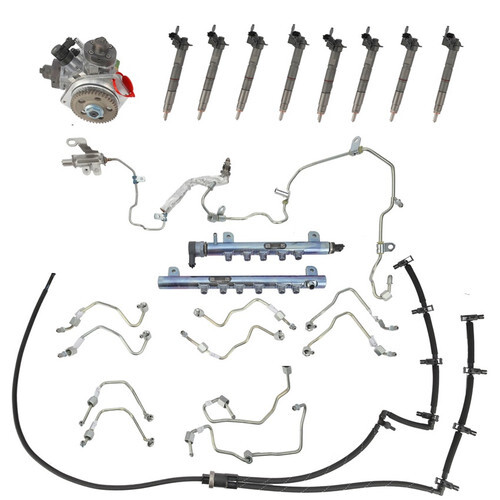
GM 6.6L Duramax LMM Fuel Contamination Kit with Pump 2007-2010 | Bostech DE6301169
Symptom Matrix: Spot Contamination Early
Catching contamination before it cascades can save thousands. Below are the classic symptom groups and how they tend to manifest.
Hard Start / No-Start
One of the earliest signs is increased cranking time or engine failure to start. Contamination interferes with precise metering and rail pressure. Causes vary: water vapor reducing prime, slime clogging pickups, or metal scoring within the pump. If hard starting occurs after sitting or in cold weather, suspect water. If it happens consistently, suspect deeper contamination.
Loss of Power / Limp Mode
Contaminated injectors lose atomization fidelity and produce uneven combustion. Expect hesitation, poor grade speed, or entry into limp mode where the ECU reduces power to protect the system. Small losses may betray early issues; large losses suggest multiple injectors or rail issues.
Fuel Rail Pressure Codes
Modern control units monitor commanded vs. actual rail pressure. Contamination often triggers codes such as P0087 (too low), P0088 (too high), P0093 (system leak), or P0191/192/193 (sensor circuit issues). Alone these codes are not proof, but when they accompany symptom clusters and recent fueling events, they strongly suggest contamination.
Rough Idle / Misfire
Uneven fuel distribution causes idle roughness. One injector may underdeliver, another misbehave. Misfires often get logged as P0300–P030x codes. Progressive degradation over days or weeks usually points toward an infection spreading through the system.
Metal Particles in Filter
Finding metal flakes or dust in your filter is often definitive. Fine metallic dust suggests early wear; heavy flakes or dense accumulation is serious. Magnetic particles hint at ferrous sources (pump internals), while bright silvery fragments often implicate aluminum parts like injectors.
Confirming Diagnosis: Tests & Inspection
Symptoms direct you, but testing confirms the problem scope and contamination type. Here are the standard diagnostic tools and methods.
Fuel Filter Autopsy
Remove the filter and place it over a white surface. Look for water droplets, dark slime, metallic dust, flakes, or crystalline material. Split open the filter element and inspect internal layers. Use a magnet on debris to distinguish ferrous vs nonferrous. Photograph every detail for records, warranty, or insurance claims.
Visual & Borescope Inspection
Inspect the tank interior via flashlight or borescope. Look for water layering, sediment, rust, flaking coatings, or slime. If accessible, inspect pump internals or cam lobes. These visual cues can confirm how severe the contamination is before teardown.
Rail Pressure Testing
Use a scan tool to monitor commanded vs actual rail pressure:
- Static test: Ignition ON, engine OFF — the system should build and hold pressure rapidly.
- Idle test: With the engine idling, track whether actual pressure mirrors commanded.
- Load test: Under throttle/load, the system must maintain pressure. If pressure collapses or fluctuates significantly, suspect pump leakage or injector issues.
Record these values; you’ll compare them after repair.
Fuel Return Flow Measurement
Leakage inside injectors returns extra fuel to the tank. Disconnect the return line, route into a graduated container, then run the engine at idle for a fixed time (often 60 seconds). Compare measured return to spec for the engine. Excess return often indicates internal injector leakage.
Laboratory Fuel Sample Testing
When diagnosis is ambiguous or for documentation, send fuel samples to a lab. Sample draw points include the bottom of the tank, filter inlet, and filter outlet. Lab tests typically measure:
- Water content (PPM)
- Particulate count & distribution
- Microbial presence
- Metal analysis (which metals, concentration)
- Fuel quality metrics (cetane, lubricity, sulfur, etc.)
Lab results often cost $40–$150 per sample, but they provide clarity and proof for warranty or insurance claims.
Full Remediation: What Must Be Addressed
Successful remediation demands more than replacing the obviously failed part. Anything that contacted contaminated fuel must be cleaned or replaced correctly. Leaving residual contamination is a recipe for failure.
Component Breakdown & Best Practices
- Fuel Tank: After draining, the tank should be removed, pressure washed with hot water and appropriate detergent, chemically treated if needed, and fully dried. Inspect for corrosion or coating damage; replace if compromised.
- Fuel Lines: Replace all flexible lines. Flush and blow out hard lines with clean diesel or solvent. Corrugations and curves trap debris.
- Filter Housing, Sensors, Seals: Disassemble, clean, and replace O-rings and gaskets. Replace water in fuel sensors or heaters if installed.
- Lift (Low Pressure) Pump: Though less precision critical, it still often must be replaced to avoid reintroducing contamination.
- High Pressure Pump (CP3 / CP4, etc.): Replace. Contamination damage is irreparable under micron tolerances.
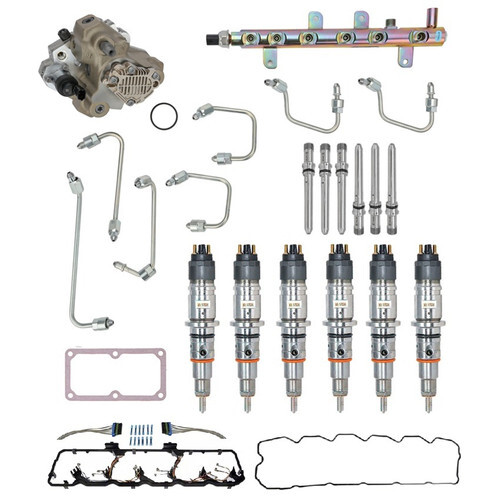
Example link: Bostech’s Ram 6.7L Cummins High Pressure CP3 Fuel Pump
Example kit link: Bostech’s Ram 6.7L Contamination Kit with CP3 Pump - Fuel Rail: Replace. Internal pitting and deposits are nearly impossible to clean reliably.
- Injectors: Replace as a matched set. Mixing new and old injectors leads to performance imbalance. Use new seals and follow torque specs exactly.
See Bostech’s injector catalog for compatibility (Bostech Auto) - Regulators / Pressure Relief Devices: Replace. Contaminants often cause them to stick or drift off spec.
Bostech provides pressure regulator and sensor parts as part of their fuel system offerings. (Bostech Auto) - Fuel Cooler (if equipped): Flush or replace, since coolant and fuel side contaminants can overlap.
- All Seals, Gaskets & Fittings: Replace all, including any quick disconnects, O-rings, and connectors. Contaminated fuel attacks seals and reusing them invites leaks or air intrusion.
Sample Checklist (to adapt per engine)
- Cleaned or replaced fuel tank
- All flexible lines (supply, return)
- Pickup screen / strainer
- Filter elements, housing, sensors
- Lift pump
- High pressure pump (or kit)
- Fuel rail and lines
- Complete injector set with seals
- Regulators / pressure devices
- Fuel cooler
- New seals, connectors, gaskets
- Priming equipment, torque tools, fluids, biocide
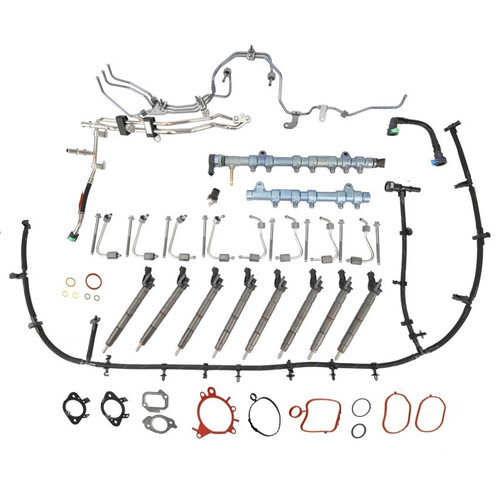
Kits simplify parts matching, reduce errors, and help ensure you don’t overlook critical items. For example, Bostech’s Ford 6.7 Fuel Contamination Kit with CP4 Pump bundles injectors, pump, rails, lines, and hardware. (Bostech Auto)
Step-by-Step Repair Process (Tank Forward)
Follow a disciplined and sequential workflow. Do not rush or mix stages.
Safety & Prep
Work in a ventilated area with fire protection. Disconnect battery negative. Use protective gear. Contain all drained fuel, solvent, and contaminated materials. Have parts, torque specs, seals, and tools ready before starting.
Tank & Line Remediation
- Drain and remove the tank.
- Filter remaining fuel to assess debris.
- Pressure wash interior with hot water and diesel-safe detergent. Rinse until clear.
- Treat with a biocide or cleaning agent if microbial presence is suspected.
- Drain fully and dry with compressed air.
- Inspect for corrosion; replace the tank if compromised.
- Replace flexible lines. Flush and blow out hard lines.
- Install clean pickup or strainers, and reseal any openings or fittings.
Filtration & Low Pressure System
- Disassemble filter housing, clean thoroughly.
- Replace all seals, sensors, and heaters.
- Install new filter elements.
- Replace or service the lift pump if indicated.
- Prime the low pressure side with clean fuel from a verified source (do not use the cleaned tank until you validate that it is clean).
High Pressure System (Pump, Rail, Injectors)
- Relieve system pressure per OEM methods.
- Disconnect lines, wiring, and components.
- Remove the old high pressure pump, clean mounting surfaces, and install the new pump using proper seals and torque.
- Remove rail and injectors. Clean the injector bore seats.
- Install injectors with new seals, lubricate O-rings, torque in sequence.
- Install the new rail and lines, reconnect all wiring and sensors.
Double-check all connections.
Reassembly & Priming
- Reinstall the cleaned tank carefully.
- Reconnect all hoses, electricals, and check routing.
- Prime the system: use hand pump, cycle ignition, or controlled cranking per vehicle procedure.
- Ensure fuel reaches filters and there is no air.
- Start the engine (expect extended cranking). Monitor for leaks, strange noises, or smoke.
- Let the engine idle for 5–10 minutes to purge air.
- Re-inspect all connections. In severe cases, consider replacing the filter again after first short interval.
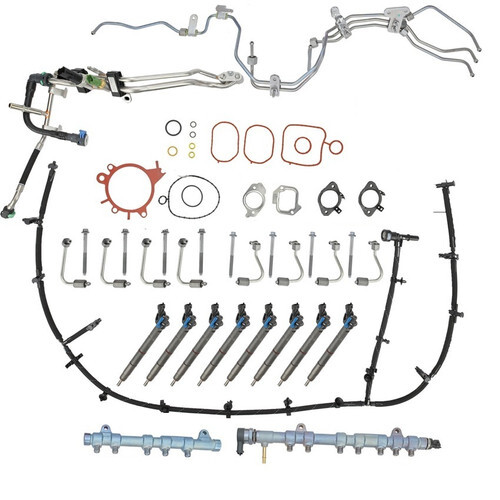
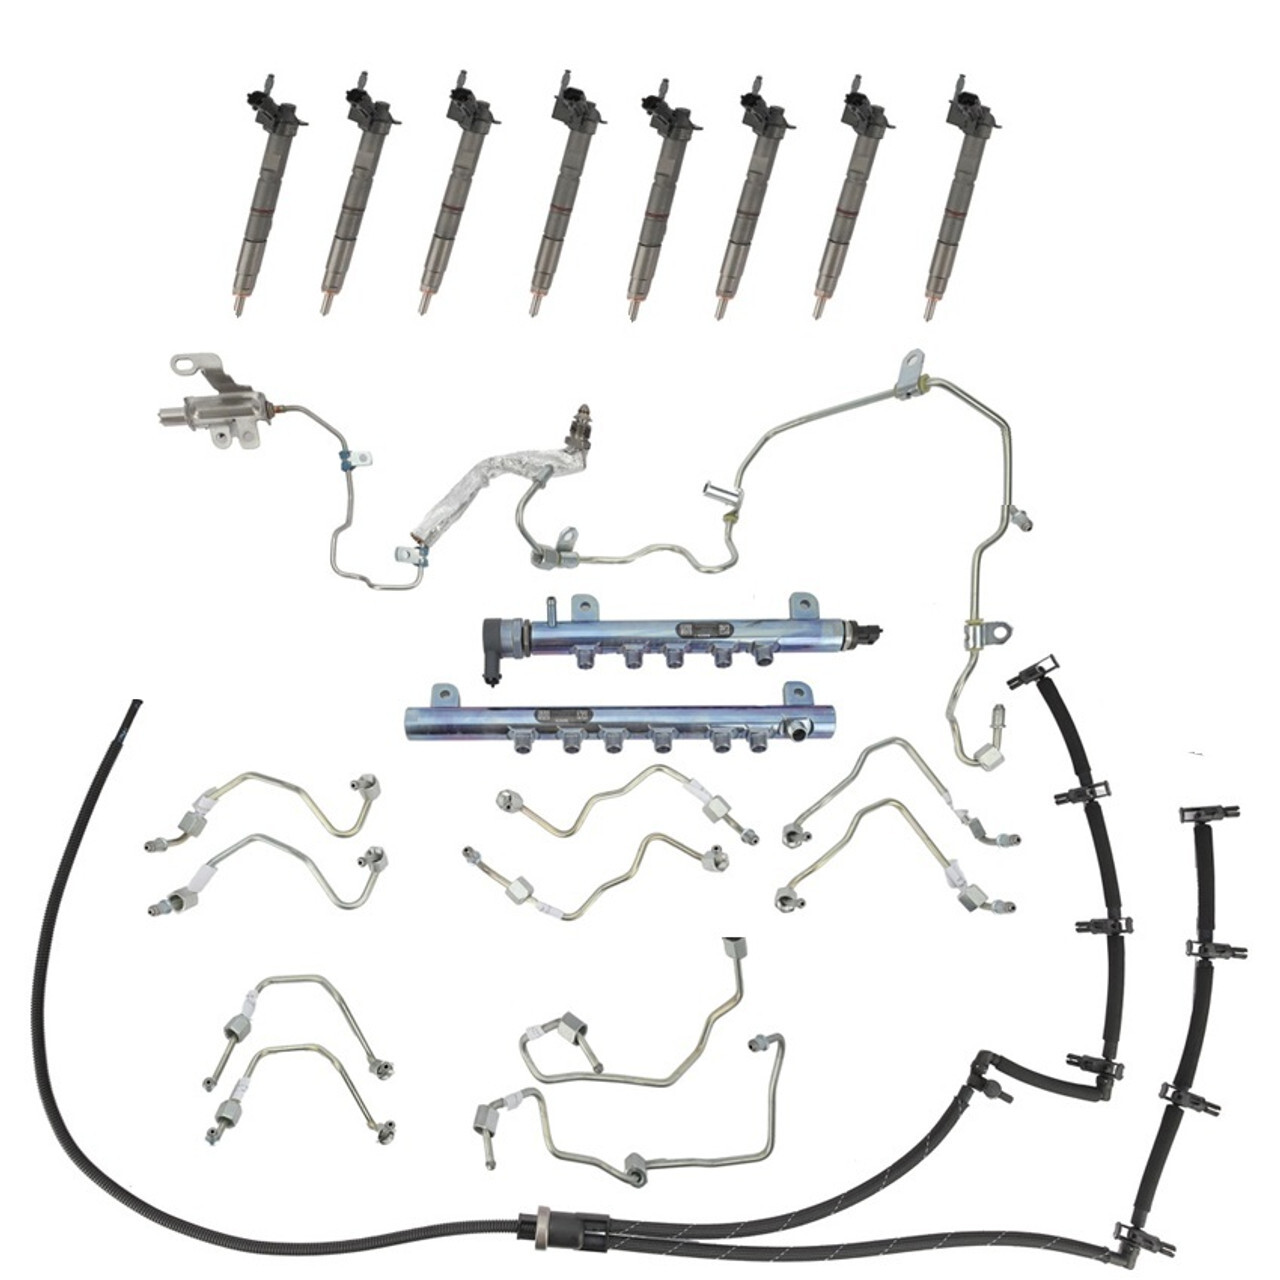
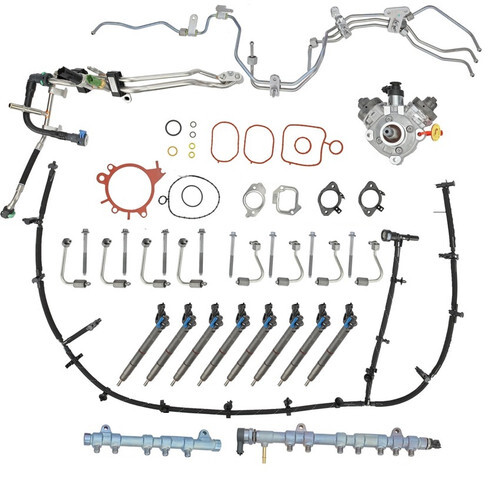
Ford 6.7L PowerStroke Fuel Contamination Kit without Pump 2011-2014 | Bostech DE6302214NP
Cost Expectations & Timing
Costs vary with severity, parts quality, engine type, and whether you DIY or use a shop.
DIY vs. Professional Service
DIY saves labor (often 40–60% of total cost), but demands skill, tools, and time. Professional shops bring diagnostic discipline, experience, and warranty coverage. Errors in contamination jobs often cost more in comebacks than the labor saved.
Light Duty (Pickups, SUVs)
- Mild contamination (tank + lines + pump): few thousand dollars in parts, several hours of work
- Moderate contamination (injectors + rail added): mid-range parts + 1–2 days of labor
- Severe contamination (DEF intrusion, metal debris): full overhaul including tank replacement, which pushes costs into higher territory
Labor for full system overhaul often spans 12–25 hours in a shop environment.
Heavy Duty & Fleet Machines
Parts scale up in size, number, and complexity. Pump, rail, and injector sets are more expensive; configurations may be unique. Labor times are longer, and downtime cost often exceeds parts cost. Fleet shops or in-house work often yield the best ROI.
Why Complete Kits Often Make the Most Sense
Ordering parts individually seems flexible but carries hidden costs and risks. Kits reduce that overhead and enforce completeness.
Time Saved in Procurement
Piecemeal sourcing involves hours of research, cross-checking, multiple orders, compatibility checks, part returns, and delays. Kits require a single part number and one order. That time saving often outweighs any nominal parts-cost difference.
Reducing Compatibility & Omission Risk
Kits are curated to ensure matching hardware, flow-matched injectors, and included seals and fasteners. They reduce risk of missing a small but critical part — for instance, the wrong injector line or missing gasket.
Simplified Warranty Management
When parts are from multiple vendors, warranty claims turn into blame games. Kits centralize responsibility. One supplier stands behind full system integrity.
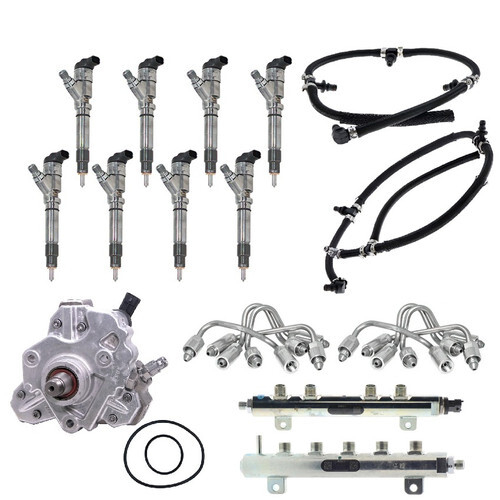
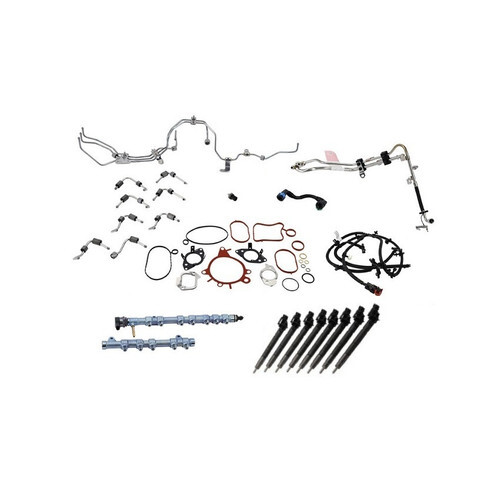
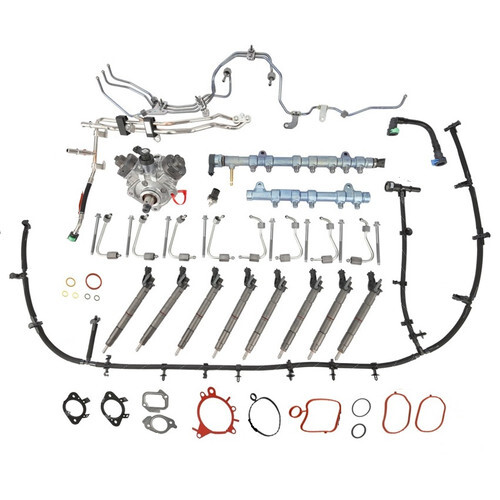
For example, Bostech’s GM 6.6L Duramax Contamination Kit (without pump) bundles injectors, lines, rails, return plumbing, and warranty coverage. (Bostech Auto)
Preventive Maintenance & Best Practice
Prevention is the most cost effective way to protect your diesel investment. The strategies below are proven in daily shop and fleet use.
Filtration Strategy
Replace filters on a fixed schedule before they become a liability. Use premium filters with high fine particle capture and water separation capability. Consider multi stage filtration systems or aftermarket supplements (Airdog, FASS, etc.)
Water Separator Practice
Drain separators frequently, especially in humid zones or after uncertain fuel fills. Use a clear container so you see separation layers. Always inspect and replace filters when contamination is drained. Never ignore water-in-fuel warnings.
Fuel Additives
- Lubricity enhancers: Use a high quality additive at every fill to protect pump and injector internals.
- Biocides: After a contamination event, biocide treatment over several fill cycles kills microorganisms. Change filters after treatment to remove remains.
Cold climate treatments: Anti-gel additives and cold flow improvers guard against wax formation and mimic contamination symptoms in freezing conditions.
Handling & Storage Best Practices
- Keep vehicle tanks as full as possible to reduce condensation
- Fuel from high turnover, reputable stations
- Avoid fueling immediately after station delivery (allow fuel to settle)
- Use filter funnels or dedicated fuel transfer equipment
- Segregate DEF and diesel storage, clearly label containers, and train operators
If storing diesel for equipment, treat, filter, and rotate fuel regularly
Maintenance Cadence Sample
- Monthly: Drain water separator, visual inspection, top off fuel
- Every 5,000 – 10,000 miles: Filter change, additive dosing, visual system check
- Every 15,000 – 20,000 miles: Pressure check, leak inspection, optional lab test
- Annually: Full system inspection, biocide treatment, tank cleaning if accessible
- Every 100,000+ miles: Tank drop/clean, line replacement, full system review
Post-Repair Validation & Monitoring
A repair is not complete until validated. Use these checks to confirm integrity and detect emerging issues early.
Code Clearing & ECU Reset
Use a scan tool to read, document, and clear all stored and pending codes. Perform reset or relearn procedures as required. Ensure linger codes do not reappear immediately.
Recheck Rail Pressure
Re-run static, idle, and load pressure tests and compare to earlier baseline values. Tight tracking between commanded and actual pressure is required at all points in the rev range.
Pilot Injection Check
Listen for smooth, quiet idle and minimal diesel knock especially during cold starts. Poor pilot injection behavior often points back to injector or control anomalies.
Fuel Return Monitoring
Immediately post-repair, remeasure return flow. Recheck at 500 and 2,500 miles. Trends upward may signal developing internal leakage.
Special Focus: Ram 6.7 Cummins & CP3 / CP4 Considerations
The 6.7 Cummins is highly popular and its contamination history, especially relating to CP4 pumps, demands extra attention.
CP4 Issues (2013–2018)
The CP4 pump design uses tighter tolerances and is more reliant on fuel lubricity. Contamination accelerates wear and metal shedding, which then cascades through the system. Preventive measures include premium filters, consistent additive use, and diligent water management. Some owners convert to CP3 using conversion kits to improve robustness.
Bostech’s Ram 6.7 Contamination Kit with CP3 Pump provides a drop-in solution with matched hardware and warranty. (Bostech Auto)
Platform Observations & Upgrades
- DEF and diesel filler locations on some trucks are too close; signage or color coding helps.
- The integrated water separator design demands regular service.
- Tank straps corrode in salt states and cause vibration stress to lines—inspect and reinforce.
- Injector hold down torque is critical due to the sensitivity of the 6.7’s seating and sealing.
2019+ Revisions
Ram updated filtration, injection hardware, and ECU tuning beyond 2019 to reduce sensitivity to marginal fuel. However, the preventive strategies remain critical.
Frequently Asked Questions
Hard starts after sitting, loss of performance under load, rough idle, fuel pressure related error codes, or visible contamination in filters. Metal fragments in filters confirm serious damage.
No. All injectors are exposed to the same fuel. Mixing new and old injectors almost always causes imbalance, roughness, emissions issues, or premature failure. Since labor is often similar, replace as a set.
Almost never. The tolerances are micron scale and even minute deposits cause damage. Only in the exceedingly rare case of pure water found before the engine is started might flushing be considered, and even then it's risky.
Stop driving immediately. Every minute circulates contaminants and increases damage. Towing is trivial compared to the cost of explosive system failure.
It depends on policy specifics. Contaminated station fuel, vandalism, or accidental DEF cross-fill may be covered, but neglect, wear, or deferred maintenance usually are excluded. Document everything: photos, lab tests, diagnostics, receipts.
CP3 is generally considered more robust and forgiving of suboptimal fuel conditions, though CP4 supports higher pressures needed for emissions systems. Many owners on susceptible platforms convert to CP3 for long-term reliability.
A clean first start, no leaks, smooth idle, correct rail pressure tracking, normal return flow, stable performance over several thousand miles, and absence of codes. Any recurring issue within weeks suggests incomplete remediation.
Practical Checklist (with Internal Product Links)
Use this as your step-by-step guide during a contamination repair or audit. Each item is essential to avoid a repeat failure.
Diagnosis Phase
- Record symptoms (hard start, power drop, roughness)
- Scan, save codes, clear after capture
- Remove and inspect fuel filter; photograph any contamination
- Use a magnet to test debris
- Inspect tank interior via borescope if available
- Perform rail pressure tests (static, idle, load)
- Measure return flow at idle
- Collect lab samples if needed
- Identify contamination source (water, microbial, DEF, metal)
- Build a full parts list
Parts & Planning Phase
- Consider full contamination kit such as Ram 6.7 CP3 Kit or Ford 6.7 CP4 Kit
- Stage or order tank, lines, hardware, injectors, pump, rails
- Ensure priming tools, torque wrenches, sealants, cleaning agents are ready
- Confirm warranty, core policies, and part compatibilities
Clean & Replace Phase
- Drain tank and remove it
- Filter debris, pressure wash, chemically treat, dry fully
- Replace flexible lines, flush hard lines, blow out with air
- Disassemble filter housing and replace all seals
- Install new filter elements
- Replace lift (low pressure) pump if required
- Prime low pressure side using verified clean fuel
- Install new high pressure pump with correct gasket and torque
- Remove rail and injectors; install new injectors, torque properly
- Install new rail and high pressure lines, reconnect sensors
- Reinstall tank, reattach hoses, wiring, and filler neck components
Priming & First Start
- Prime until fuel reaches filter
- Use ignition cycling, manual priming, or scan tool commands
- Start engine (expect extended cranking)
- Inspect for leaks & listen closely
- Idle engine to purge air
- Reinspect seals and connections
- Optionally replace filter after short initial run to catch residual debris
Validation Phase
- Clear codes and perform any required ECU resets
- Recheck rail pressure and compare to baseline
- Measure return flow
- Listen for smooth idle and pilot injection sound
- Test drive over 10–20 miles under varied load
- Re-scan for codes
Documentation & Follow Up
- Archive photos, scan logs, pressure data, and receipts
- File warranty registrations
- Monitor performance at intervals (500 mi, 2,500 mi)
- Follow preventive maintenance schedule

Closing Thoughts
Diesel fuel contamination is a threat to reliability, performance, and cost control. The modern common rail fuel system is unforgiving: even minuscule contamination can trigger cascading damage. The recipe for success is:
- Spot trouble early via symptoms, pressure diagnostics, filter autopsy, and inspections.
- Replace or clean everything that was exposed to contamination — tank, lines, pump, rail, injectors, sensors, seals.
- Favor comprehensive kits to streamline parts sourcing, reduce errors, and simplify warranty coverage.
- Validate carefully with pressure tests, return flow checks, and test drives.
- Protect moving forward with rigorous preventive maintenance: filtration, water control, additives, and good fuel handling.
A consistent annual investment in filters, additives, inspections, and storage discipline pales in comparison to the cost of full system remediation. For highly vulnerable platforms like 6.7 Cummins and modern Powerstroke or Duramax engines, the added attentiveness is justified.
Using product links directly to Bostech’s high pressure pumps, kits, injectors, and system components enhances usability, readability, and conversion potential. When customers see a solution in the diagnosis narrative, the leap from education to action is smaller and more natural.